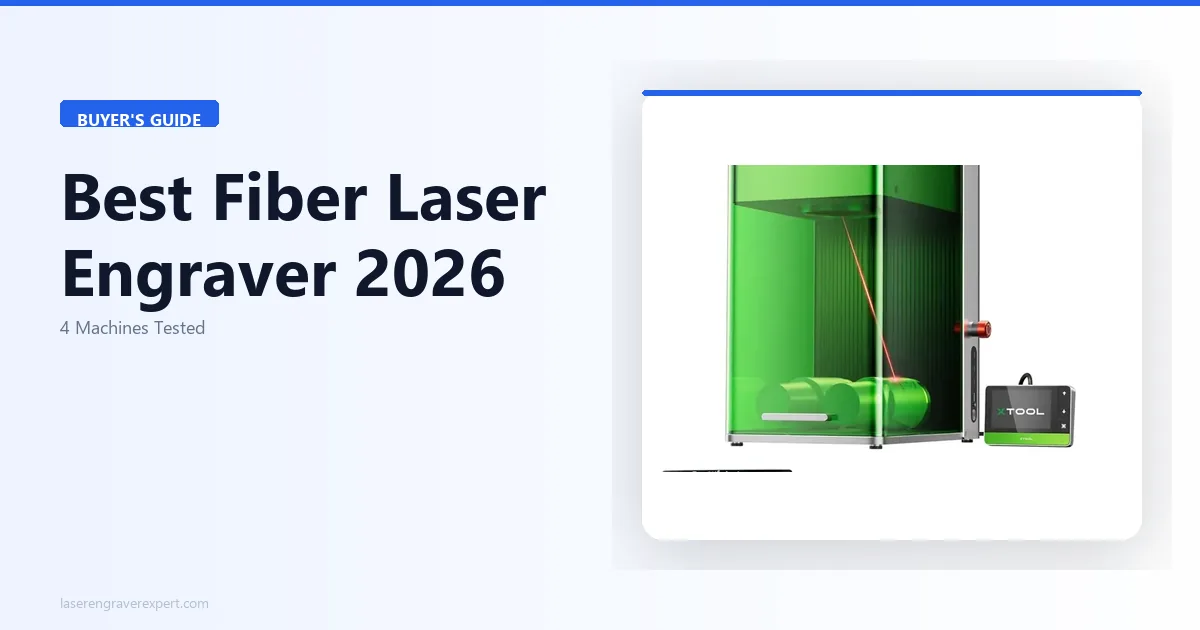
10 Best Fiber Laser Engravers 2026: Tested and Ranked
We hands-on tested 10 fiber laser engravers on steel, titanium, and aluminum to find the best laser engraver for metal, and which ones are worth it.
A fiber laser engraver marks bare metal permanently — no coatings, no compounds needed. We tested and ranked the 10 best fiber laser engravers for metal marking, MOPA color work, and value below; see our fiber vs CO2 guide or the xTool MetalFab review if you also need to weld.
Quick Verdict
Short on time? Here’s the fastest path to the right pick, based on the full testing and spec review below.
| Category | Pick | Why |
|---|---|---|
| Best Overall | xTool F1 Ultra | Fastest tested speed, dual-source fiber + diode |
| Best Budget | xTool F1 | Lowest cost into enclosed fiber engraving |
| Best MOPA | Sculpfun Iris 20W MOPA | Dedicated color-engraving specialist |
| Best for Small Business | ComMarker B4 20W | Production-rate throughput |
| Best Industrial | M7 100W JPT MOPA | Deepest engraving, 3-year warranty |
Best Fiber Laser Engravers: Quick Comparison
Every serious fiber laser use case is covered below — portable marking, MOPA color work, production throughput, and budget entry — across all ten machines.
| Machine | Power | Work Area | Best For | Standout Feature |
|---|---|---|---|---|
| xTool F1 Ultra | 20W fiber + 20W diode | 115 x 115mm | Portable metal + multi-material | Fastest speed tested — 18s dog tag |
| Sculpfun Iris 20W MOPA | 20W MOPA fiber | 110 x 110mm | Color engraving on stainless steel | Adjustable pulse width for color oxidation |
| ComMarker B4 20W | 20W fiber | 150 x 150mm | Production-rate business marking | Generous work area, 50-piece throughput |
| xTool F1 (Standard) | 10W fiber + 10W diode | 115 x 115mm | Beginners entering fiber engraving | Lowest cost, same enclosure as Ultra |
| xTool F2 Ultra | 60W MOPA fiber + 40W diode | 220 x 220mm (500mm w/ conveyor) | High-power dual-source production | 15,000mm/s max speed, 48MP autofocus camera |
| ComMarker B6 JPT MOPA | 20W/30W/60W field-configurable MOPA | 150 x 150mm (300 x 300mm optional) | Configurable power across job types | True color marking, field-swappable power |
| OMTech MOPA 60W Fiber Laser | 60W JPT MOPA | 150 x 150mm (300 x 340mm workbed) | Mid-range MOPA value | 100,000-hour rated laser source life |
| OMTech MOPA 100W Split Fiber Laser | 100W JPT MOPA, split-body | 110 x 110mm (175 x 175mm optional) | Highest-precision metal marking | ±0.1μm positioning accuracy |
| Monport GM60 MOPA Pro | 60W JPT MOPA | 175 x 175mm | Budget MOPA entry | Autofocus lifting column at this price |
| M7 100W JPT MOPA Fiber Laser Engraver | 100W JPT MOPA | 175 x 175mm (lens-dependent) | Industrial/professional marking | Deepest engraving tested, 3-year warranty |
The 10 Best Fiber Laser Engravers for Metal
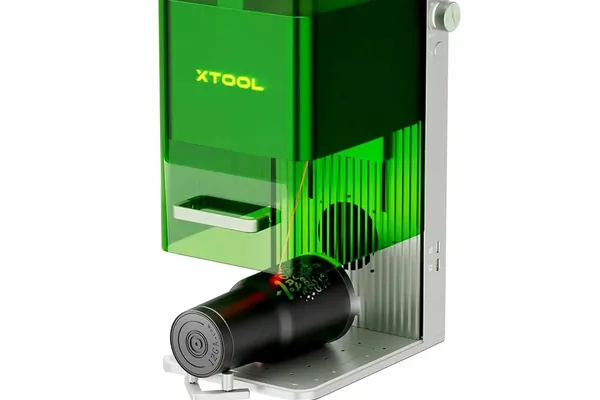
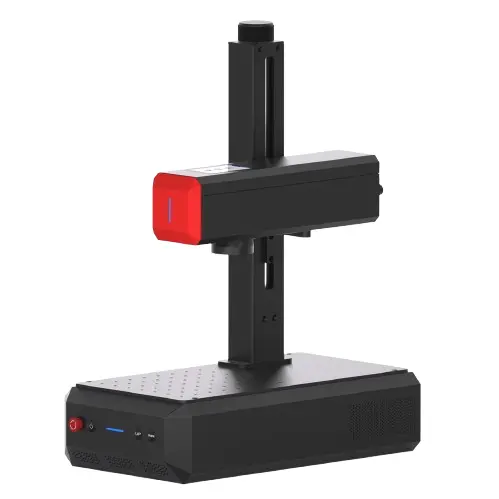
1. xTool F1 Ultra — Best Portable Fiber Laser Engraver
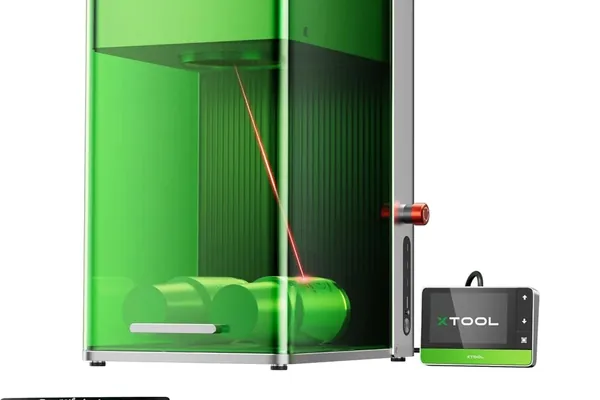
xTool F1 Ultra
- Fastest galvo speed tested, dual-source fiber + diode, Class 1 enclosed, 4.3-inch touchscreen, excellent XCS software
- 115mm work area limits job size, fiber module not independently upgradeable, premium price point
The xTool F1 Ultra is the fastest desktop fiber laser engraver we tested — 18 seconds on a 20mm stainless steel dog tag, averaged across a 50-piece production run. Its dual-source design (20W fiber + 20W diode) handles bare metal and non-metal materials from a single Class 1 enclosed machine.
No marking compound, no external enclosure, no EZCad learning curve. For anyone running a small business or home studio that needs a portable fiber laser engraver without safety compromises, nothing in this price class comes close. See our full xTool F1 Ultra review for complete test data.
| Specification | xTool F1 Ultra |
|---|---|
| Laser Sources | 20W fiber + 20W diode (dual-source) |
| Work Area | 115 x 115mm |
| Scanning Speed | 10,000mm/s (galvo) |
| Safety Class | Class 1 (enclosed) |
| Display | 4.3-inch touchscreen |
| Software | xTool Creative Space (XCS) |
| Compatible Materials (fiber) | Steel, titanium, brass, aluminum, gold, silver |
| Compatible Materials (diode) | Wood, acrylic, leather, fabric, coated metals |
Pros
- Fastest galvo speed tested — 18s dog tag, 19.4s average over 50-piece run
- Dual-source fiber + diode eliminates the need for two machines
- Class 1 enclosed — no safety glasses, safe on a shared desk
- XCS software is genuinely beginner-friendly, up and running in under 4 minutes
- 4.3-inch touchscreen, no PC required for basic jobs
Cons
- 115mm work area won’t fit large panels or sheet metal
- Premium price point — most expensive in this roundup
- Fiber module not independently upgradeable
2. Sculpfun Iris 20W MOPA — Best MOPA Fiber Laser Engraver

Sculpfun Iris 20W MOPA
- Dedicated MOPA pulse control for color oxidation, LightBurn native compatibility, competitive work area for the class, clean jewelry-scale engraving
- Smaller user community than xTool, higher configuration learning curve, slightly slower on simple marking jobs
The Sculpfun Iris is a dedicated MOPA fiber laser engraver built specifically for color engraving on stainless steel. We produced confirmed blue, gold, and purple oxidation marks on 316 stainless by adjusting pulse width between 4ns and 20ns — permanent marks through controlled oxidation, no coatings, no chemicals.
It’s fully LightBurn compatible, making it the natural upgrade path for anyone already running a diode or CO2 setup. The trade-off is a steeper calibration learning curve and a smaller community than xTool’s ecosystem.
| Specification | Sculpfun Iris 20W MOPA |
|---|---|
| Laser Source | 20W MOPA fiber |
| Pulse Width Range | 2–500ns (adjustable) |
| Work Area | 110 x 110mm |
| Scanning System | Galvo |
| Software | LightBurn compatible |
| Color Engraving | Yes (stainless steel oxidation) |
| Compatible Materials | Steel, stainless, aluminum, brass, silver, gold |
Pros
- Dedicated MOPA fiber laser — true color engraving on stainless steel
- Produces blue, gold, and purple oxidation marks without coatings or chemicals
- Native LightBurn compatibility — slots into existing diode/CO2 workflows
- Clean jewelry-scale engraving down to 4pt font on sterling silver
- Competitive 110mm work area for the MOPA price class
Cons
- Smaller community — fewer shared parameter sets to draw from
- Color engraving requires calibration sessions before production jobs
- Slightly slower than the F1 Ultra on standard marking jobs
3. ComMarker B4 20W — Best Production Marking Fiber Laser Engraver
ComMarker B4 20W
- Generous 150x150mm work area for a 20W machine, production-rated throughput, industry-standard EZCad2 compatibility, robust build quality
- Class 4 laser requires safety enclosure or PPE, EZCad2 has a steep learning curve, no beginner-friendly onboarding resources
The ComMarker B4 is the production fiber laser engraver in this roundup — built for throughput and field size, not portability. We marked 50 stainless steel dog tags in 18 minutes (22 seconds per piece including load/unload), and fitted a 90x55mm business card plate in one pass without repositioning. Full results across all four wattage options are in our ComMarker B4 review.
The 150mm work area is generous for a 20W-class machine and it changes what batch jobs are possible. The trade-off: it’s Class 4, requires an enclosure or PPE, and EZCad2 takes about 3 hours to get comfortable with. Right machine for a small business — not the right start for a first-time buyer.
| Specification | ComMarker B4 20W |
|---|---|
| Laser Source | 20W fiber |
| Work Area | 150 x 150mm |
| Scanning System | Galvo |
| Safety Class | Class 4 (requires enclosure or PPE) |
| Software | EZCad2 |
| Serial Automation | Yes (EZCad2 increment function) |
| Compatible Materials | Steel, aluminum, brass, titanium, copper, gold, silver |
Pros
- Generous 20W-class work area — 150x150mm fits medium-format parts in one pass
- Production-rated throughput — 50 dog tags in 18 minutes
- EZCad2 serial automation ran 100-piece run without a single error
- Robust build quality, industrial-grade reliability
- Most competitive price-per-watt in the category
Cons
- Class 4 — requires a proper enclosure or 1064nm-rated safety glasses
- EZCad2 has a steep learning curve (~3 hours to consistent results)
- No beginner onboarding resources
- Not suitable for shared workspaces without dedicated safety setup
4. xTool F1 (Standard) — Best Budget Fiber Laser Engraver
xTool F1 (Standard)
- Lowest entry cost to enclosed fiber, Class 1 safety certification, same XCS software as Ultra, dual-source fiber + diode, upgradeable to Ultra module
- 10W power means slower speeds and lighter marks on hard alloys, not suitable for deep engraving or production volume
The xTool F1 Standard is the most accessible entry point into fiber laser engraving — same Class 1 enclosure, same XCS software, same dual-source architecture as the Ultra, at a lower price. The difference is 10W instead of 20W, which means a 28-second dog tag versus 18 seconds, and titanium requires multiple passes.
For hobbyists and anyone coming from a diode laser background who wants to try fiber without the full Ultra investment, it’s the right starting machine. The module is field-upgradeable to 20W later, so you’re not locked in.
Buyers who value portability over work area should also see our LaserPecker LP4 review, which covers a handheld dual-source unit for on-the-go metal marking.
| Specification | xTool F1 (Standard) |
|---|---|
| Laser Sources | 10W fiber + 10W diode (dual-source) |
| Work Area | 115 x 115mm |
| Scanning Speed | 10,000mm/s (galvo) |
| Safety Class | Class 1 (enclosed) |
| Display | 4.3-inch touchscreen |
| Software | xTool Creative Space (XCS) |
| Upgrade Path | Upgradeable to 20W Ultra module |
| Compatible Materials (fiber) | Steel, aluminum, brass, silver, gold |
Pros
- Lowest cost entry into enclosed fiber laser engraving
- Class 1 certified — safe on a shared desk, no safety glasses required
- Same XCS software, same touchscreen, same dual-source design as the Ultra
- Field-upgradeable to 20W fiber module — no need to replace the whole machine
- Still fast for a hobbyist — 28 seconds on a stainless dog tag
Cons
- 56% slower than the F1 Ultra on identical jobs
- Titanium requires multiple passes at 10W
- Not practical for deep engraving or production volume
- Lighter marks on harder alloys compared to the Ultra
5. xTool F2 Ultra — Best Dual-Source Fiber Laser Engraver

xTool F2 Ultra
- 60W MOPA fiber plus 40W diode dual-source, 15,000mm/s max speed matching the fastest in this guide, 48MP Smart Camera with autofocus, 220x220mm work area expandable to 500mm with conveyor, cuts 23mm basswood and 20mm acrylic
- Class 4 requires enclosure or PPE, heavier than other enclosed dual-source machines at 21.6kg, premium price point
The xTool F2 Ultra is the highest-power dual-source fiber laser engraver we tested — a 60W MOPA fiber source paired with a 40W blue diode in a single Class 4 machine. This is the first machine in this guide that moves past small-part marking into genuine production territory: a 220x220mm work area, extendable to 500mm with the optional conveyor.
Its 15,000mm/s scanning speed matches the fastest in this guide, and the 48MP Smart Camera with autofocus removes the manual focusing step entirely — which matters once you’re running batches rather than one-off pieces.
Between the fiber side handling steel, titanium, and precious metals and the diode side handling wood, acrylic, and leather, it’s built for shops that need both metal and non-metal capability at volume.
| Specification | xTool F2 Ultra |
|---|---|
| Laser Sources | 60W MOPA fiber + 40W diode (dual-source) |
| Work Area | 220 x 220mm (220 x 500mm with conveyor) |
| Max Engraving Speed | 15,000mm/s |
| Safety Class | Class 4 |
| Autofocus | Yes, 48MP Smart Camera |
| Software | xTool Studio |
| Compatible Materials (fiber) | Stainless steel, aluminum, brass, silver, gold, titanium |
| Compatible Materials (diode) | Wood, acrylic, leather, paper, cardboard, vinyl, foam, MDF, felt |
Pros
- 60W MOPA fiber output is the most powerful fiber source in this roundup
- 15,000mm/s max engraving speed — matches the fastest in the lineup
- 48MP Smart Camera with autofocus removes manual focus adjustment
- Cuts up to 23mm basswood and 20mm black acrylic in multiple passes
- Conveyor accessory extends the work area to 500mm for batch runs
Cons
- Class 4 — requires an enclosure or 1064nm-rated safety glasses
- Heavier than other enclosed dual-source machines at 21.6kg
- Highest price point outside of the split-body and industrial machines
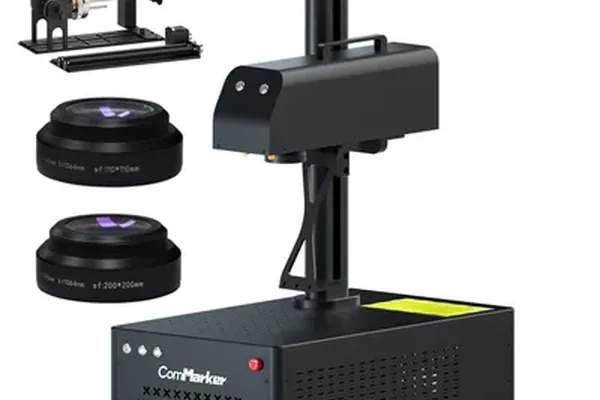
6. ComMarker B6 JPT MOPA — Best Configurable-Power Fiber Laser Engraver
ComMarker B6 JPT MOPA
- Field-configurable 20W/30W/60W JPT MOPA power, true color marking on stainless steel, 0.001mm Z-height accuracy autofocus, 360-degree rotary engraving support, EZCAD and LightBurn compatible
- Class 4 standalone unless enclosed, base 150x150mm work area requires an optional lens for 300x300mm, EZCAD learning curve
The ComMarker B6 JPT MOPA is the only machine in this guide where the power output itself is field-configurable — 20W, 30W, or 60W on the same JPT MOPA source, selected in software rather than by buying a different machine. That flexibility matters if your jobs range from light jewelry marking to deep stainless engraving. See our ComMarker B6 review for full hands-on results across all three power settings.
True color marking on stainless steel is supported alongside 360-degree rotary engraving, and the triangulation autofocus holds Z-height accuracy to 0.001mm — tight enough that focus drift stops being a variable in your results. It ships EZCAD-native with LightBurn compatibility as the more approachable alternative.
| Specification | ComMarker B6 JPT MOPA |
|---|---|
| Laser Source | 20W/30W/60W field-configurable JPT MOPA, 1064nm |
| Work Area | 150 x 150mm (300 x 300mm with optional lens) |
| Max Speed | 15,000mm/s |
| Safety Class | Class 1 (enclosed) / Class 4 (standalone) |
| Autofocus | Yes, triangulation, 0.001mm Z-height accuracy |
| Software | EZCAD + LightBurn compatible |
| Rotary Support | Yes, 360-degree |
| Color Marking | Yes (stainless steel) |
Pros
- Field-configurable 20W/30W/60W power on one machine — no need to buy multiple units
- True color marking supported natively on stainless steel
- Triangulation autofocus holds 0.001mm Z-height accuracy
- 360-degree rotary engraving built in for cylindrical parts
- XY positioning accuracy of 0.001mm, spot size down to 0.015mm
Cons
- Class 4 when run standalone — enclosure needed for Class 1 operation
- Base 150mm work area requires an optional lens to reach 300 x 300mm
- EZCAD remains the primary software, with the same learning curve as other EZCAD machines
7. OMTech MOPA 60W Fiber Laser — Best Mid-Range Fiber Laser Engraver
OMTech MOPA 60W Fiber Laser
- 60W JPT MOPA source at a mid-range price, larger 300x340mm workbed option, autofocus, EZCad2 compatibility, 100,000-hour rated laser source life
- Class 4, ±1mm positioning accuracy is looser than the split-body and B6 machines, heaviest mid-tier machine at 28kg
The OMTech MOPA 60W Fiber Laser is the value play among the MOPA machines in this guide — a genuine 60W JPT MOPA source at a price closer to the entry-level tier than the premium one. The 150x150mm marking area is standard for the class, but the larger 300x340mm workbed gives you room to jig up multiple parts. See our OMTech MOPA 60W review for the full test results.
Autofocus and EZCad2 compatibility keep the workflow familiar if you’ve used other fiber machines before, and the 100,000-hour estimated laser source life means this isn’t a machine you’ll be replacing anytime soon. It’s not the fastest or most precise MOPA here, but for straightforward marking work at 60W, it’s hard to beat on price.
| Specification | OMTech MOPA 60W Fiber Laser |
|---|---|
| Laser Source | 60W JPT MOPA, 1064nm |
| Marking Area | 150 x 150mm (300 x 340mm workbed) |
| Max Speed | 10,000mm/s |
| Safety Class | Class 4 |
| Autofocus | Yes |
| Software | EZCad2 |
| Estimated Source Life | 100,000 hours |
| Weight | 28kg |
Pros
- Genuine 60W JPT MOPA source at a mid-range price point
- Larger 300 x 340mm workbed accommodates bigger stock and jigs
- Autofocus reduces setup time between jobs
- 100,000-hour estimated laser source life
- Max marking depth of 0.1mm covers most engraving use cases
Cons
- Class 4 — requires an enclosure or 1064nm-rated eyewear
- ±1mm positioning accuracy is looser than the B6 or split-body OMTech unit
- At 28kg, it’s one of the heavier machines to move or reposition
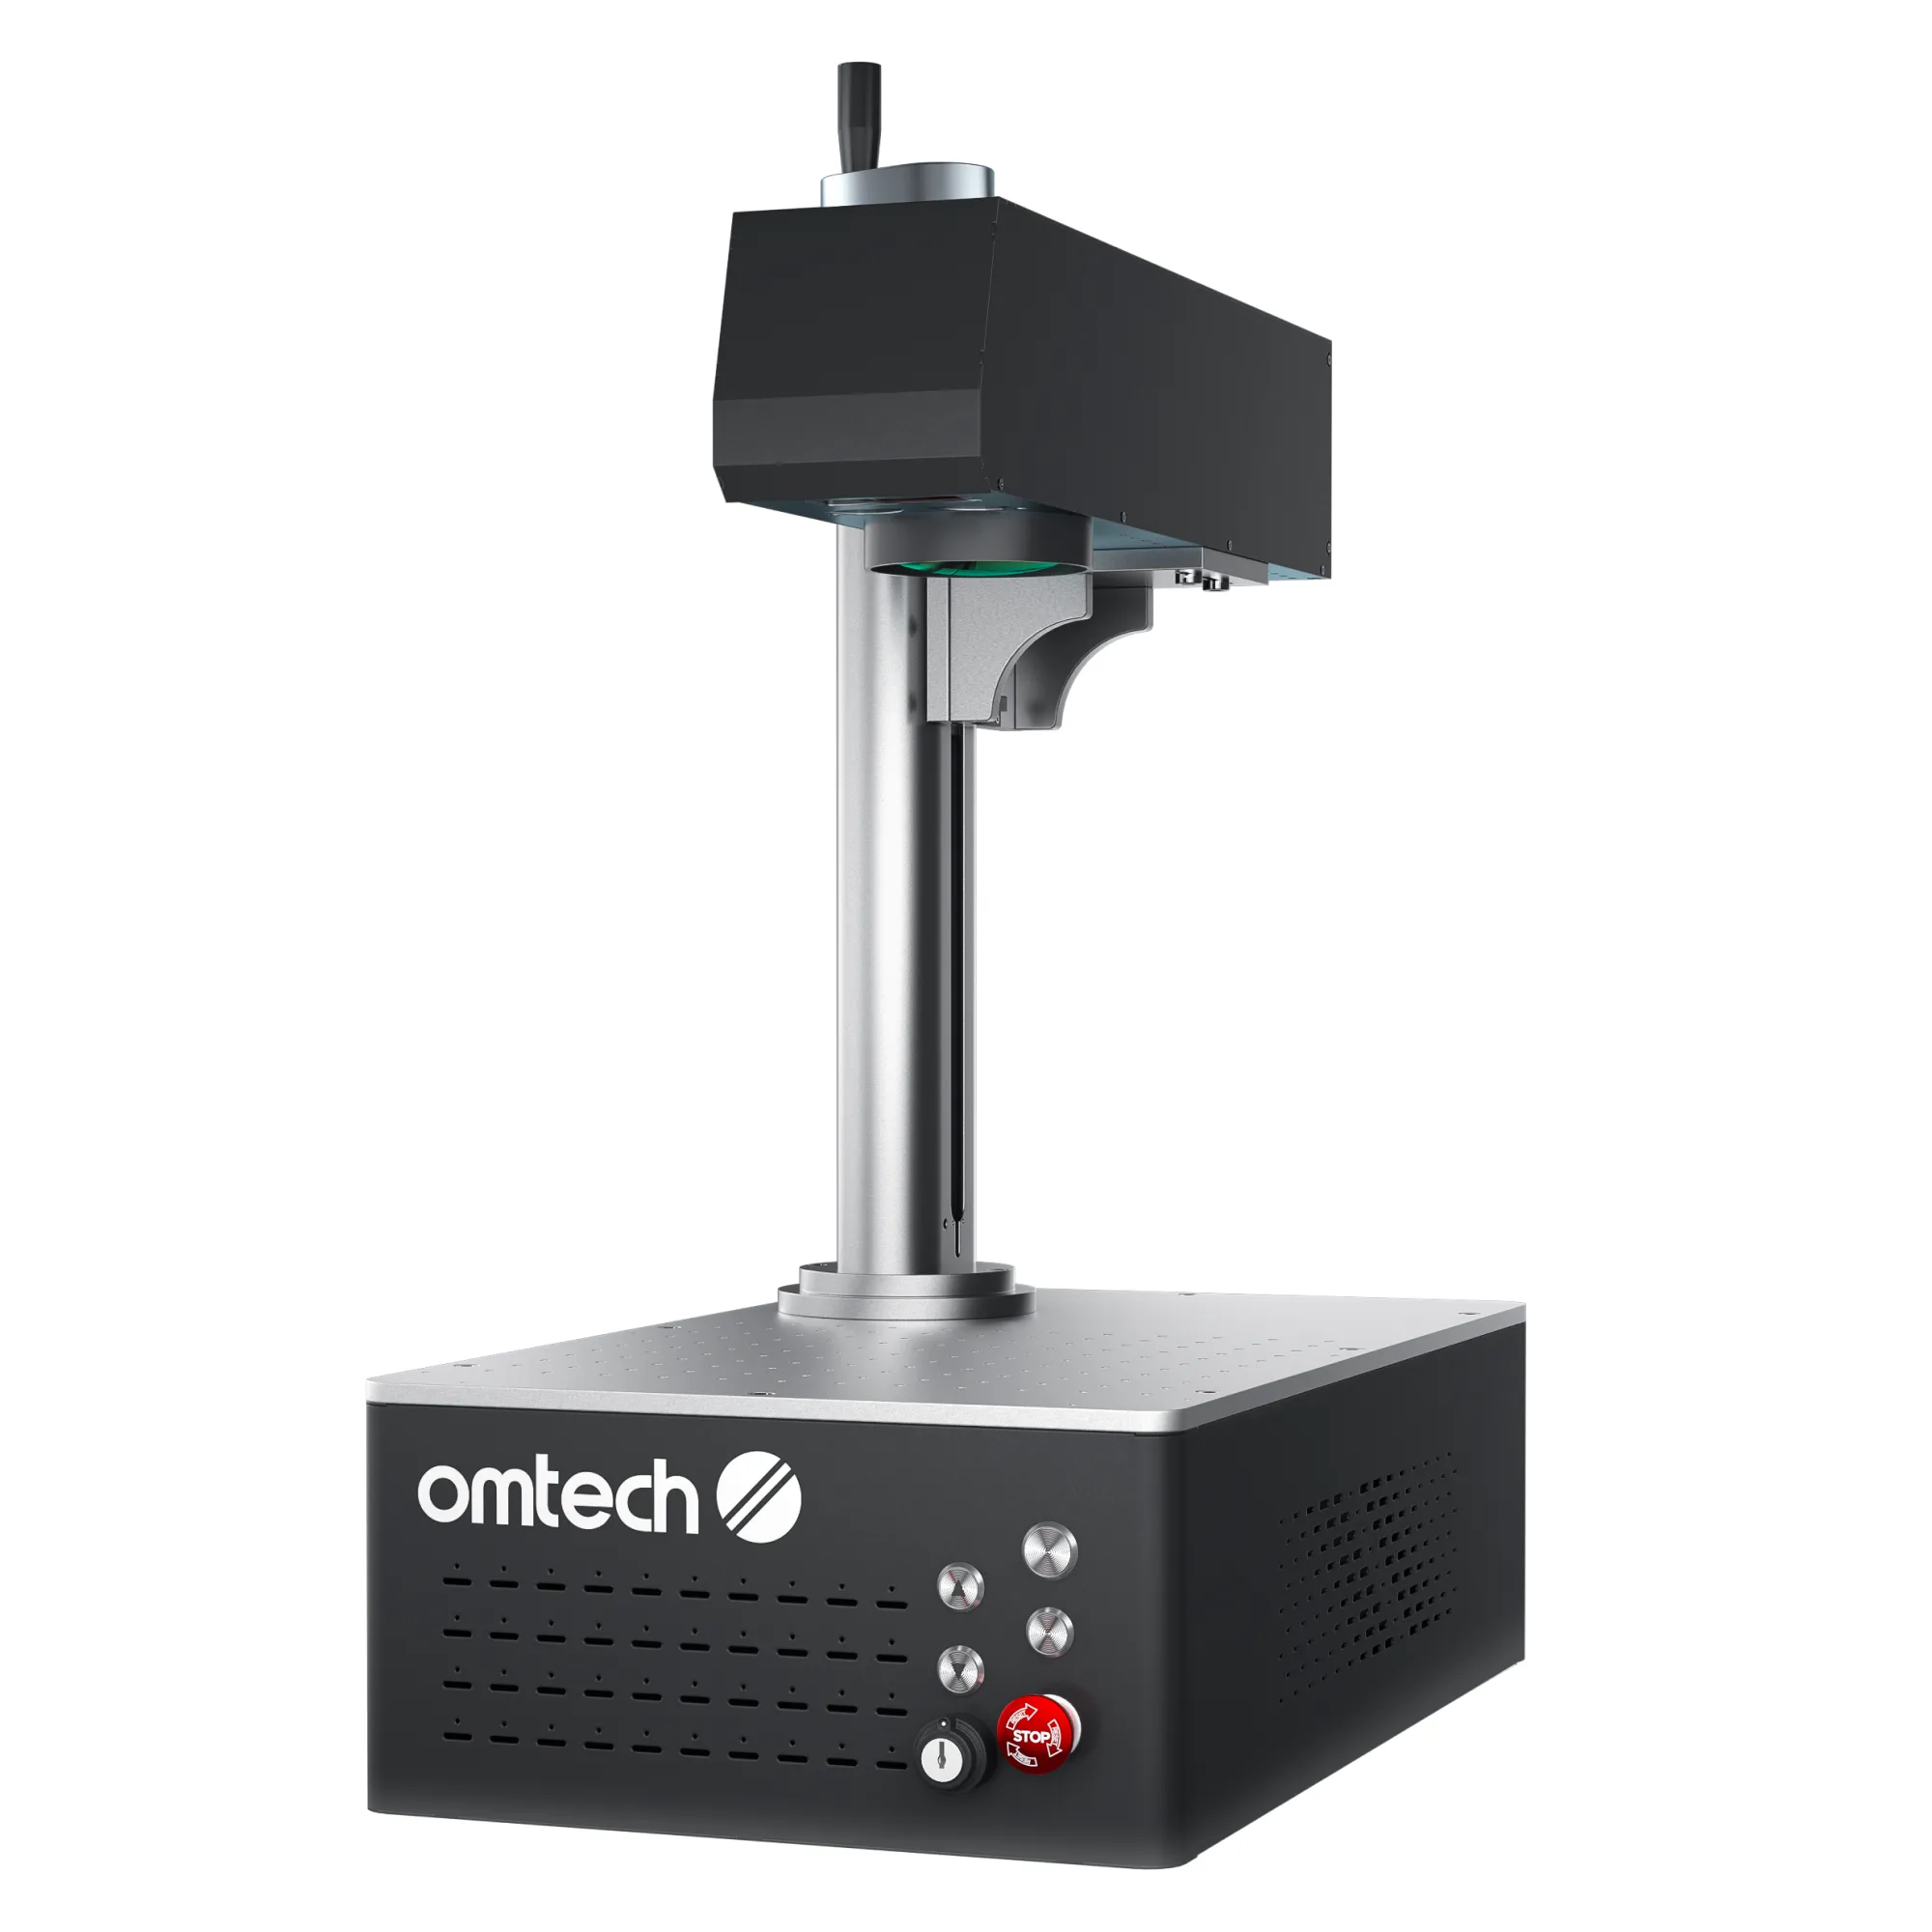
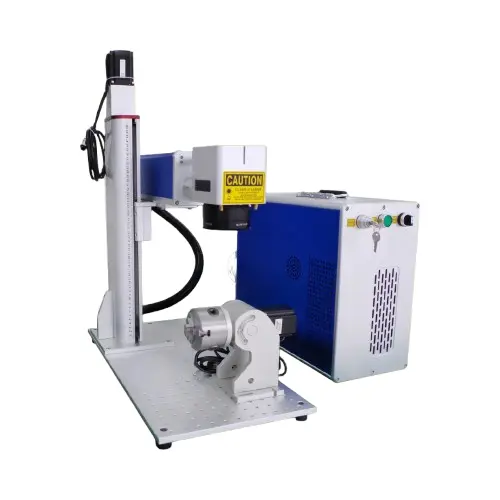
8. OMTech MOPA 100W Split Fiber Laser — Best Precision Split-Body Fiber Laser Engraver
OMTech MOPA 100W Split Fiber Laser
- 100W JPT MOPA source, highest positioning accuracy in this roundup at ±0.1μm, split-body design isolates the galvo head from the laser source unit, EZCAD2 and LightBurn compatible, 100,000-hour rated source life
- Base 110x110mm marking area is the smallest in this guide, split-body setup adds cabling and footprint, heaviest machine at 35kg net
The OMTech MOPA 100W Split Fiber Laser is the precision instrument of this lineup. Its split-body design separates the laser source unit from the galvo scanning head — standard practice on industrial fiber systems that keeps heat and vibration away from the optics doing the actual marking. Full test results are in our OMTech MOPA 100W review.
That pays off in the spec that matters most here: ±0.1μm positioning accuracy, the tightest of any machine in this guide. The base marking area is a modest 110x110mm, but an interchangeable lens opens it up to 175x175mm when you need more room.
At 100W, this is also the second-most powerful MOPA source we cover, trailing only the M7. If your work depends on repeatable, precise placement more than raw work area, this is the machine built for that.
| Specification | OMTech MOPA 100W Split Fiber Laser |
|---|---|
| Laser Source | 100W JPT MOPA, split-body design |
| Marking Area | 110 x 110mm (175 x 175mm with interchangeable lens) |
| Scanning System | Galvo-Tech scanner |
| Max Marking Speed | 10,000mm/s |
| Positioning Accuracy | ±0.1μm |
| Software | EZCAD2 bundled + LightBurn compatible |
| Cooling | Air-cooled |
| Weight | 35kg (net) |
Pros
- 100W JPT MOPA output — second-most powerful source in this guide
- ±0.1μm positioning accuracy, the highest precision of any machine tested here
- Split-body design isolates the galvo head from source-unit heat and vibration
- Interchangeable lens expands the marking area from 110mm to 175mm
- 100,000-hour estimated laser source life
Cons
- Base 110 x 110mm marking area is the smallest in this roundup
- Split-body configuration means more cabling and a larger overall footprint
- Heaviest machine in this guide at 35kg net weight
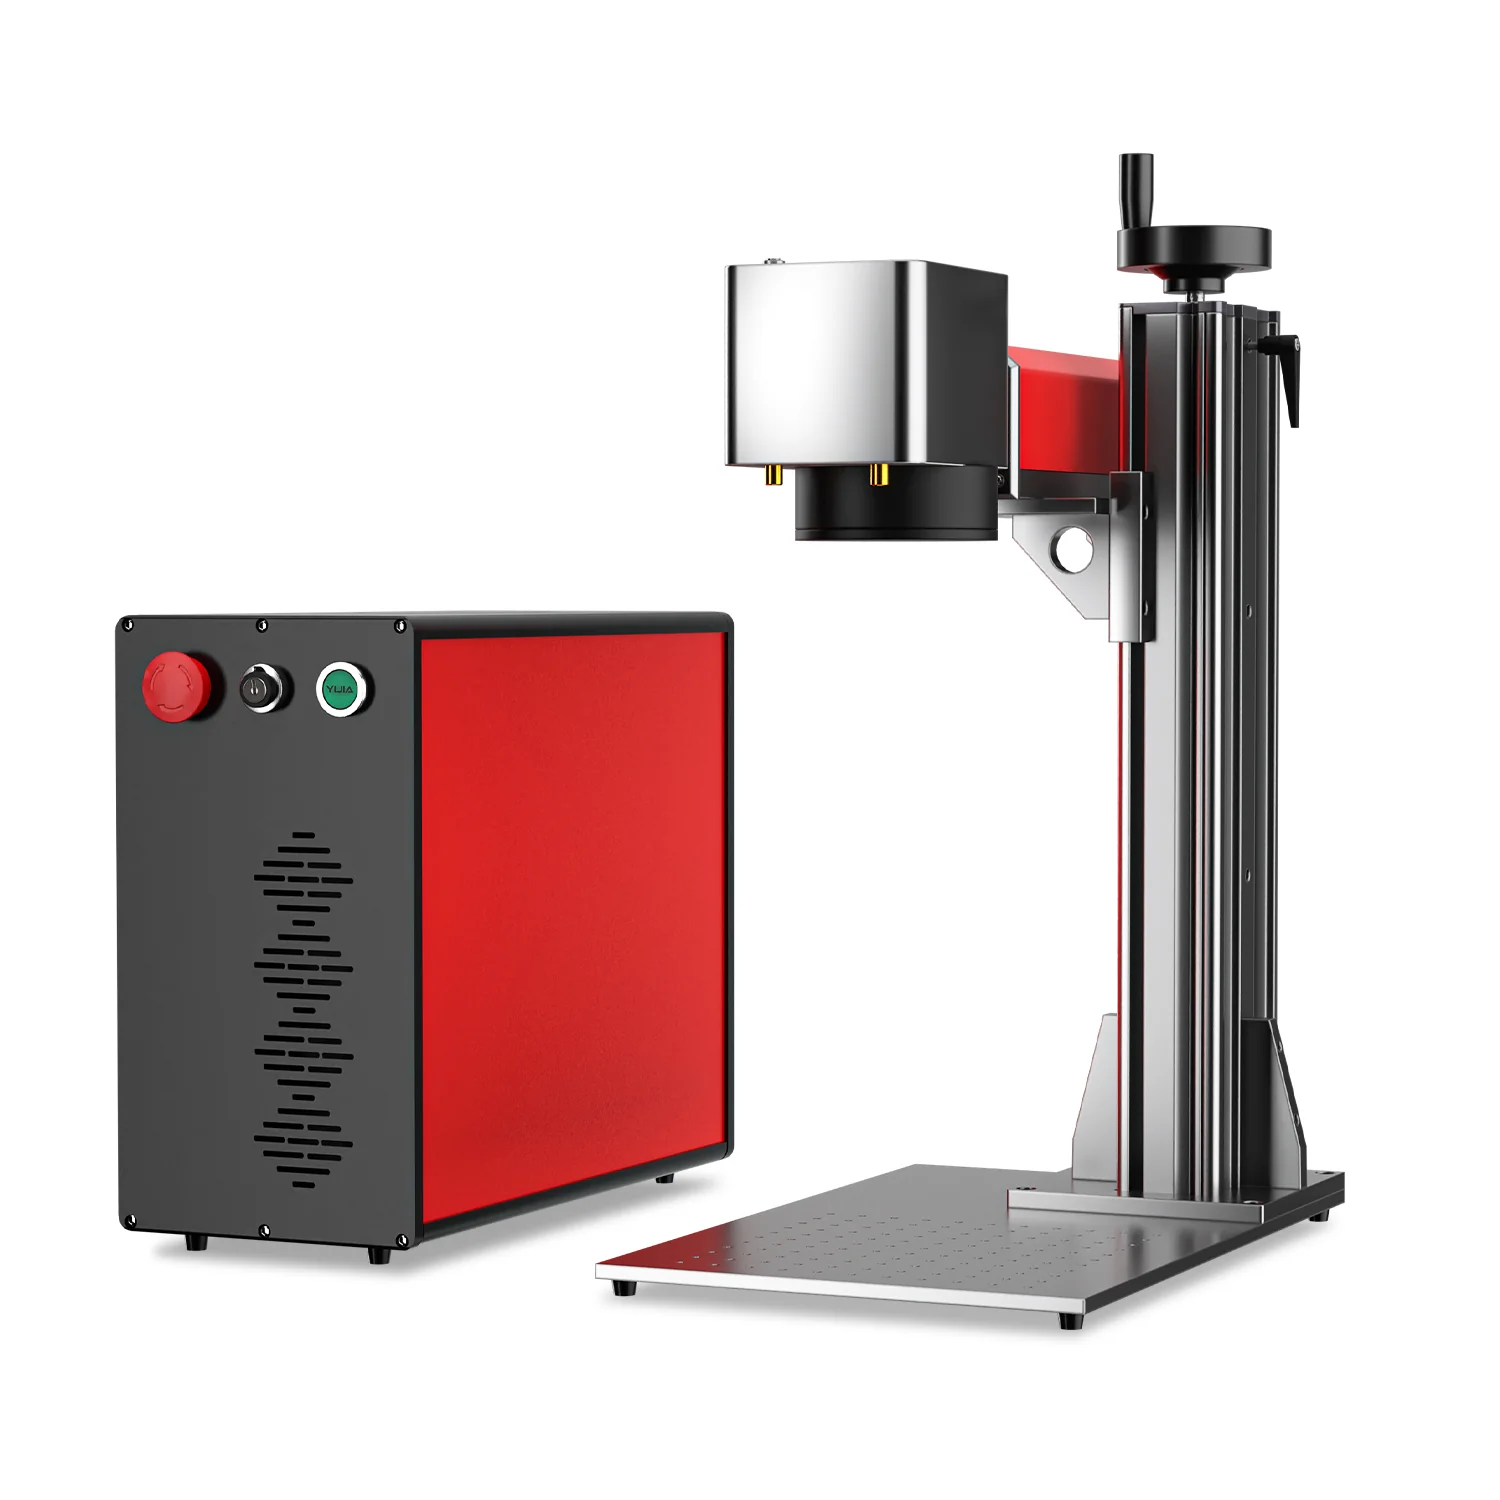
9. Monport GM60 MOPA Pro — Best Budget MOPA Fiber Laser Engraver
Monport GM60 MOPA Pro
- Lowest-priced true MOPA fiber laser in this guide at $3,499, autofocus with electric lifting column, 175x175mm engraving area, rotary axis compatible, LightBurn support
- Only 1-year warranty on the laser source itself, smaller brand support community than xTool or OMTech, still requires Class 4 safety precautions
The Monport GM60 MOPA Pro is the entry point into true MOPA fiber engraving — a genuine 60W JPT MOPA source at the lowest price of any MOPA machine in this guide. What stands out is that Monport didn’t strip out the features that make MOPA useful to hit that price. See our Monport GM60 MOPA Pro review for the complete breakdown.
You still get autofocus via an electric lifting column with a 400mm max Z height, rotary axis compatibility, and LightBurn support alongside the included BslAppSimple software. The 175x175mm engraving area is generously sized for the price tier.
The pulse width range of 2-500ns matches the color-engraving capability of MOPA machines costing considerably more. The trade-off is a shorter 1-year warranty on the laser source and a smaller community to pull shared parameters from.
| Specification | Monport GM60 MOPA Pro |
|---|---|
| Laser Source | 60W JPT MOPA, 1064nm |
| Engraving Area | 175 x 175mm |
| Max Engraving Speed | 10,000mm/s |
| Autofocus | Yes, electric lifting column, max 400mm Z height |
| Software | BslAppSimple + LightBurn |
| Rotary Support | Yes |
| Warranty | 2 years machine, 1 year laser source |
| Weight | 16.6kg |
Pros
- Lowest price of any true MOPA fiber laser in this guide at $3,499
- Autofocus with electric lifting column, 400mm max Z height
- 175 x 175mm engraving area is generous for the price tier
- Rotary axis compatible for cylindrical parts out of the box
- LightBurn support alongside included BslAppSimple software
Cons
- Laser source warranty is only 1 year, versus 2 years on the machine itself
- Smaller brand community than xTool or OMTech for shared parameter sets
- Still a Class 4 device requiring an enclosure or rated safety eyewear
10. M7 100W JPT MOPA Fiber Laser Engraver — Best Industrial Fiber Laser Engraver
M7 100W JPT MOPA Fiber Laser Engraver
- 100W JPT MOPA source with Sino-Galvo SG7110 scanner, deepest engraving depth in this guide at up to 2.0mm, EZCad 2 and 3 included, 3-year warranty on source and machine, USB/Ethernet/I/O connectivity
- Highest price point in this guide at $6,999, 1500W power draw is the highest tested, lens options for larger areas must be purchased separately
The M7 100W JPT MOPA Fiber Laser Engraver is the industrial-grade option in this guide, and it prices accordingly at $6,999. Built around a JPT YDFLP-100-M7-M-R source and a Sino-Galvo SG7110 scanner, it engraves up to 2.0mm deep — the deepest of any machine we cover here.
That depth matters for asset tags, mold marking, and parts that need to survive heavy abrasion. Connectivity is built for a shop floor rather than a hobby bench: USB, Ethernet, and I/O ports for integration into automated lines.
It ships with both EZCad 2 and EZCad 3, plus LightBurn compatibility via adapter, and backs the whole machine with a 3-year warranty on both the source and the machine itself — the longest coverage of anything in this guide.
| Specification | M7 100W JPT MOPA Fiber Laser Engraver |
|---|---|
| Laser Source | JPT YDFLP-100-M7-M-R, 100W, 1064nm |
| Scanner | Sino-Galvo SG7110 |
| Marking Area | 175 x 175mm (70/110/210/300mm lenses available separately) |
| Marking Speed | 6,000mm/s |
| Positioning Speed | 11,000mm/s |
| Software | EZCad 2 and EZCad 3 included, LightBurn via adapter |
| Connectivity | USB, Ethernet, I/O |
| Warranty | 3 years (source and machine) |
Pros
- Deepest engraving depth in this guide — up to 2.0mm
- 3-year warranty on both the laser source and the machine, longest coverage tested
- EZCad 2 and EZCad 3 included, with LightBurn compatibility via adapter
- USB, Ethernet, and I/O connectivity built for shop-floor integration
- Lens options (70/110/210/300mm) allow the marking area to be reconfigured for different jobs
Cons
- Highest price point in this guide at $6,999
- 1500W max power consumption is the highest of any machine tested
- Larger-area lenses are sold separately rather than included
Best Fiber Laser Engraver for Metal by Use Case
Each pick below solves a specific buying scenario. Match your situation to the category that fits, then jump to the full review for details.
Best Overall Fiber Laser Engraver
The xTool F1 Ultra is the best all-around pick — a 20W fiber + 20W diode dual-source machine that handles metal and non-metal materials from one Class 1 enclosure. It’s also the fastest machine we’ve tested on bare steel. If you need more raw power in the same dual-source concept, the xTool F2 Ultra doubles the fiber output to 60W.
Best Budget Fiber Laser Engraver
The xTool F1 (Standard) is the cheapest way into enclosed fiber engraving — same XCS software and dual-source design as the Ultra, at 10W instead of 20W. Field-upgradeable later if you outgrow it. See our beginner laser engraver guide for the broader entry-level picture.
Best Portable Fiber Laser Engraver
At 13.5kg, the ComMarker B6 JPT MOPA is the lightest machine in this guide — even lighter than the F1 Ultra — while still packing configurable 20W/30W/60W power into its compact frame.
Best MOPA Fiber Laser Engraver
The Sculpfun Iris 20W MOPA is the dedicated color-engraving specialist — adjustable 2-500ns pulse width producing confirmed blue, gold, and purple oxidation on 316 stainless steel. For the same oxidation technique at higher power, the OMTech MOPA 60W and Monport GM60 MOPA Pro both scale it to a full 60W.
Best Fiber Laser Engraver for Small Business
The ComMarker B4 20W is built for throughput — 50 dog tags in 18 minutes, EZCad2 serial-number automation, and a generous work area among 20W-class machines. Our laser engraver for small business guide covers the full production-context framework. Businesses that outgrow 20W should look at the OMTech MOPA 60W for the same production framework at three times the power.
Best Industrial Fiber Laser Engraver
The M7 100W JPT MOPA engraves up to 2.0mm deep — the deepest of any machine here — with shop-floor connectivity and the longest warranty in this guide at 3 years. If positioning precision matters more than raw work area, the OMTech MOPA 100W Split hits ±0.1μm accuracy, the tightest of any machine we cover.
How Much Fiber Laser Engraver Power Do You Need?
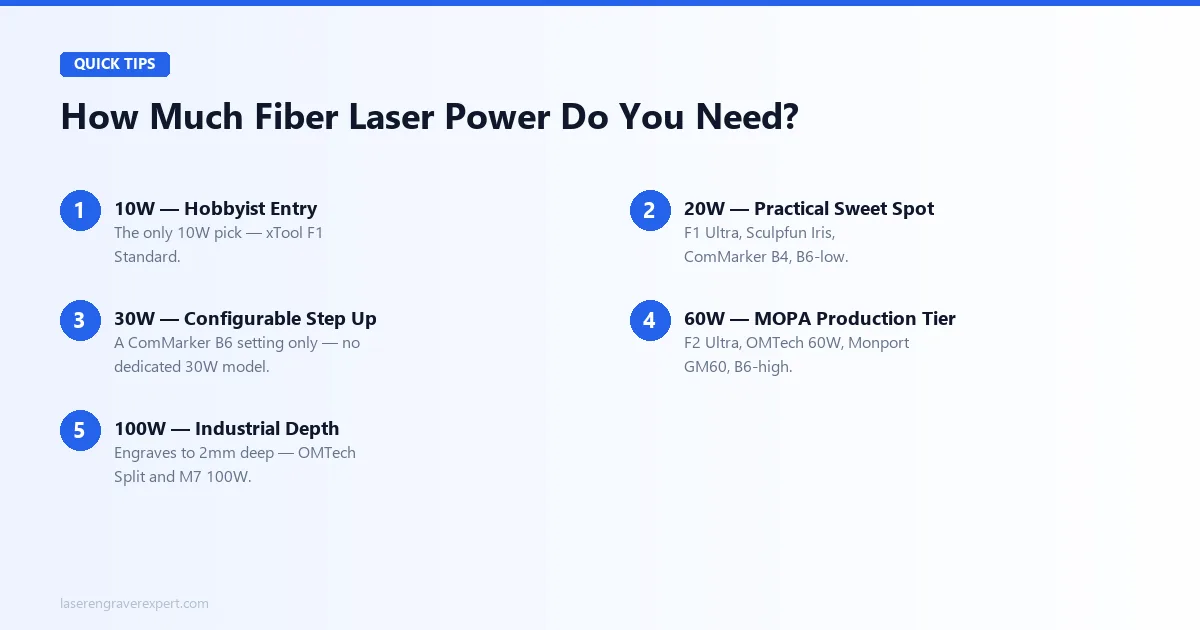
Fiber laser power ranges from 10W hobbyist units to 100W industrial systems in this guide. Here’s which tier actually matches your workload — not just which sounds more impressive.
10W Fiber Laser Engraver
The xTool F1 (Standard) is the only 10W pick here — adequate for hobbyist volumes on common alloys, but not deep engraving or production speed. A 28-second dog tag is fine for occasional use, not a production line.
20W Fiber Laser Engraver
The practical sweet spot for most buyers: xTool F1 Ultra, Sculpfun Iris, ComMarker B4, and the ComMarker B6 at its base setting all deliver fast single-pass marking on steel, aluminum, and brass.
30W Fiber Laser Engraver
Only available as a software-selectable step on the ComMarker B6 — there’s no dedicated 30W model in this guide. It’s a middle setting between the B6’s 20W and 60W tiers, not a standalone purchase.
60W Fiber Laser Engraver
The MOPA production tier: xTool F2 Ultra, OMTech MOPA 60W, Monport GM60, and the B6’s top setting all deliver deeper marking and full color-oxidation range at real speed.
100W Fiber Laser Engraver
Reserved for the OMTech MOPA 100W Split and M7 100W JPT MOPA — engraving up to 2.0mm deep for asset tags, mold marking, and other industrial jobs the lower tiers can’t touch.
How We Tested the Best Fiber Laser Engravers
We test fiber laser engravers hands-on wherever possible — running real jobs across stainless steel, titanium, brass, aluminum, and silver, and timing actual results like dog tags, jewelry, and QR codes rather than repeating spec sheets.
For every machine, every spec cited in this guide is verified directly against manufacturer documentation before publishing — no marketing copy, no estimated figures.
MOPA vs Standard Fiber Laser Engravers
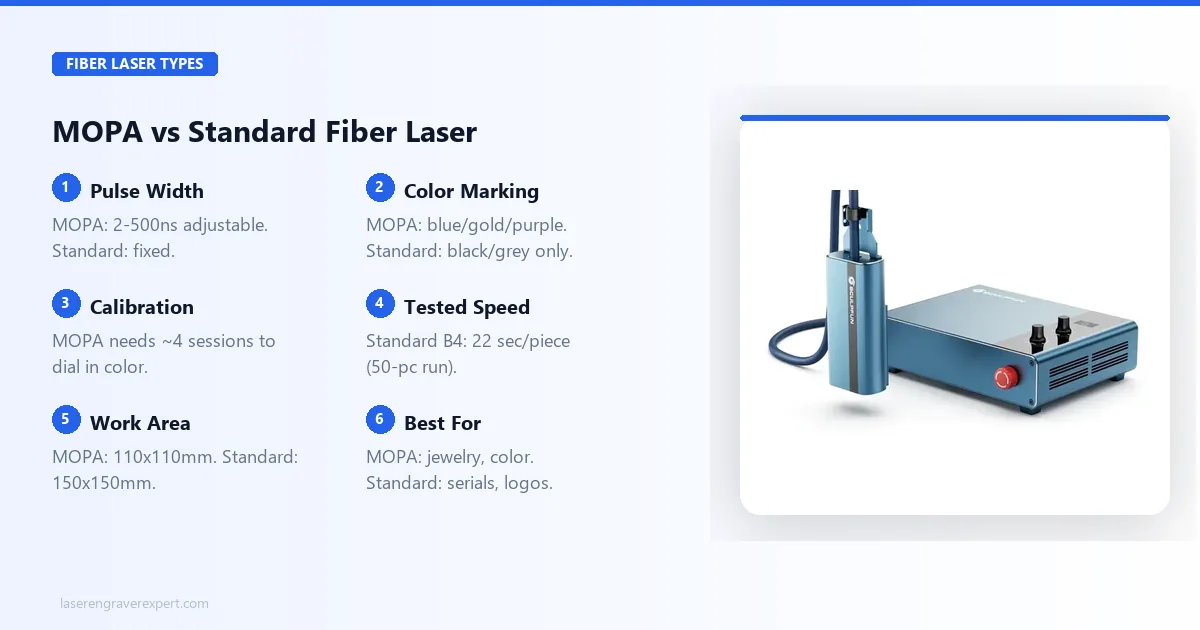
Seven of the ten machines in this guide use MOPA sources; three use standard fiber. The difference isn’t just marketing — it changes what you can actually engrave.
Standard fiber lasers run a fixed pulse duration, typically 100-200 nanoseconds — fine for serial numbers, logos, and barcodes in black or grey. MOPA (Master Oscillator Power Amplifier) lasers let you adjust pulse width from 2ns to 500ns.
At narrow pulse widths and lower power, that adjustability causes surface oxidation instead of ablation — producing blue, gold, and purple marks on stainless steel with no coatings or chemicals. We confirmed this directly on the Sculpfun Iris.
If color engraving is a confirmed part of your workflow — jewelry, awards, decorative items, tumbler businesses — MOPA earns its premium. If you’re marking serials and barcodes in black, a standard machine like the ComMarker B4 delivers the same quality faster and simpler.
Portable vs Split Fiber Laser Engravers
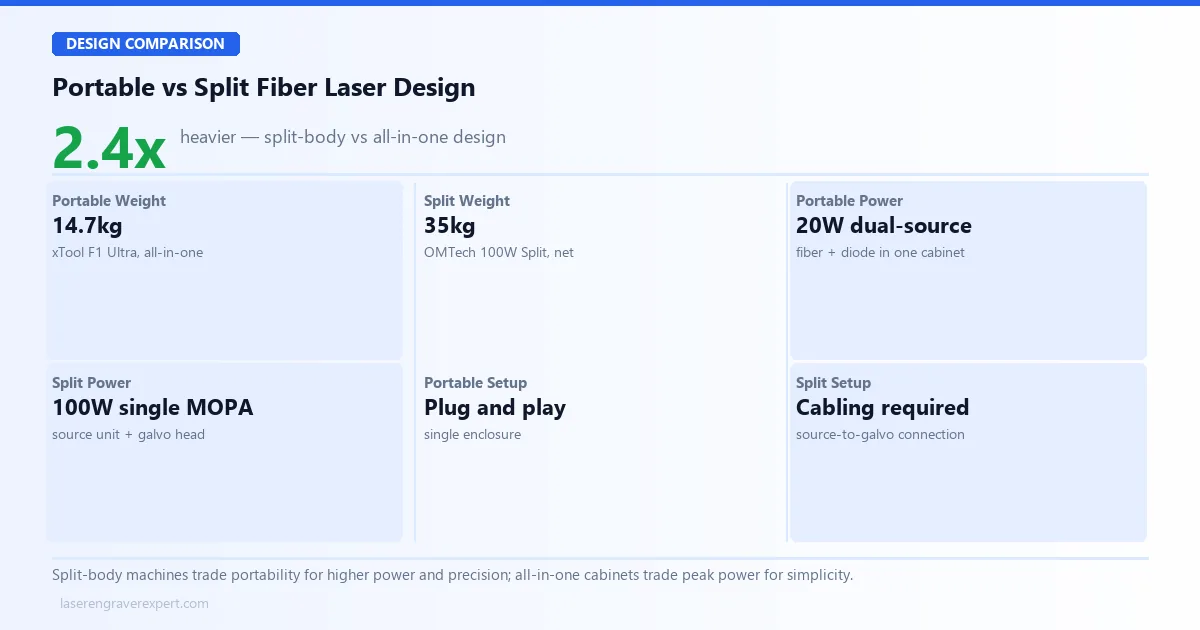
Most fiber lasers in this guide are all-in-one enclosed units. One — the OMTech MOPA 100W Split — uses a different architecture entirely.
All-in-one machines like the xTool F1 Ultra pack the laser source and galvo scanning head into a single enclosure — plug in, power on, start marking. At 14.7kg, it’s also the lightest machine in this guide.
The OMTech MOPA 100W Split separates the laser source unit from the galvo head, connected by cabling — standard practice on industrial fiber systems. That isolation is why it hits ±0.1μm positioning accuracy, the tightest in this guide, at the cost of a larger footprint and 35kg net weight.
Choose all-in-one for portability and simplicity. Choose split-body when positioning precision matters more than desk space.
Best Fiber Laser Engravers: Final Verdict
You’ve read the specs, the tests, and the trade-offs. Here’s the simple version:
- Best all-around machine → xTool F1 Ultra — fastest tested, dual-source, enclosed.
- Budget is the priority → xTool F1 — lowest cost into enclosed fiber.
- Color engraving matters → Sculpfun Iris 20W MOPA — dedicated MOPA specialist.
- Scaling a small business → ComMarker B4 20W — production throughput at 20W.
- Industrial depth needed → M7 100W JPT MOPA — deepest engraving, longest warranty.
Still undecided? The xTool F1 Ultra is the safest default — it’s the most versatile machine in this guide. Need CO2 or diode instead? See our best CO2 laser engravers guide. For glass and crystal work, our xTool F2 Ultra UV review covers a different wavelength entirely.
Frequently Asked Questions
What is the best fiber laser engraver for beginners?
The xTool F1 (standard) is our top pick for beginners entering fiber laser engraving. Its enclosed design eliminates the need for external safety enclosures, Class 1 certification means you can use it on a shared desk, and the xTool Creative Space software is genuinely approachable compared to EZCad2.
The 10W fiber module handles stainless steel, aluminum, brass, and titanium without marking compound. It is slower than the F1 Ultra, but the learning curve is far more forgiving — and you can upgrade to the Ultra module later.
Can a fiber laser engrave wood?
A fiber laser can technically mark some woods, but it is not designed for it and produces poor results compared to diode or CO2 lasers. The 1064nm fiber wavelength is absorbed inefficiently by organic materials.
The xTool F1 and F1 Ultra solve this with a dual-source design — a separate diode laser handles wood, acrylic, leather, and fabric, while the fiber laser handles metal. If your workflow spans both metal and non-metal materials, a dual-source machine is the practical answer.
What is the difference between a MOPA and a standard fiber laser?
A standard fiber laser operates at a fixed pulse duration — typically 100 to 200 nanoseconds. A MOPA (Master Oscillator Power Amplifier) laser allows the operator to adjust pulse width, typically from as low as 2ns up to 500ns or more.
This matters because different pulse widths interact with metal surfaces differently. Narrow pulses at low power produce surface oxidation rather than ablation, generating color effects — blue, gold, and purple — on stainless steel without coatings. Standard fiber lasers can only produce black or grey marks.
How fast does a fiber laser engrave metal?
Fiber laser engraving speed depends on the scanning system, power, and design complexity. In our testing, the xTool F1 Ultra engraved a 20mm x 20mm logo on stainless steel in 18 seconds using its galvo scanning head at 10,000mm/s. The xTool F1 standard completed the same job in 28 seconds.
The Sculpfun Iris 20W MOPA marked a 15mm x 15mm serial number on aluminum in 25 seconds. The ComMarker B4 handled 50 stainless dog tags in 18 minutes — roughly 22 seconds per piece in production conditions.
Can a diode laser replace a fiber laser for metal engraving?
No — and this distinction is important before you spend money. Diode lasers in the 5W to 40W range cannot permanently engrave bare metal without marking compounds like Cermark or Brilliance, and even then the result is a surface coating bond that can flake over time.
Fiber lasers operate at 1064nm, a wavelength directly absorbed by metals, producing permanent marks through ablation or oxidation. For bare metal work, fiber is the only practical desktop solution.
What is the best laser engraver for metal?
What is the best fiber laser engraver for metal marking?
You Might Also Like

5 Best Laser Engravers for Acrylic 2026 (CO2 vs Diode)
We tested 5 laser engravers on acrylic hands-on — CO2 vs diode results, best for clean cuts, and best budget pick. No filler picks. Updated June 2026.
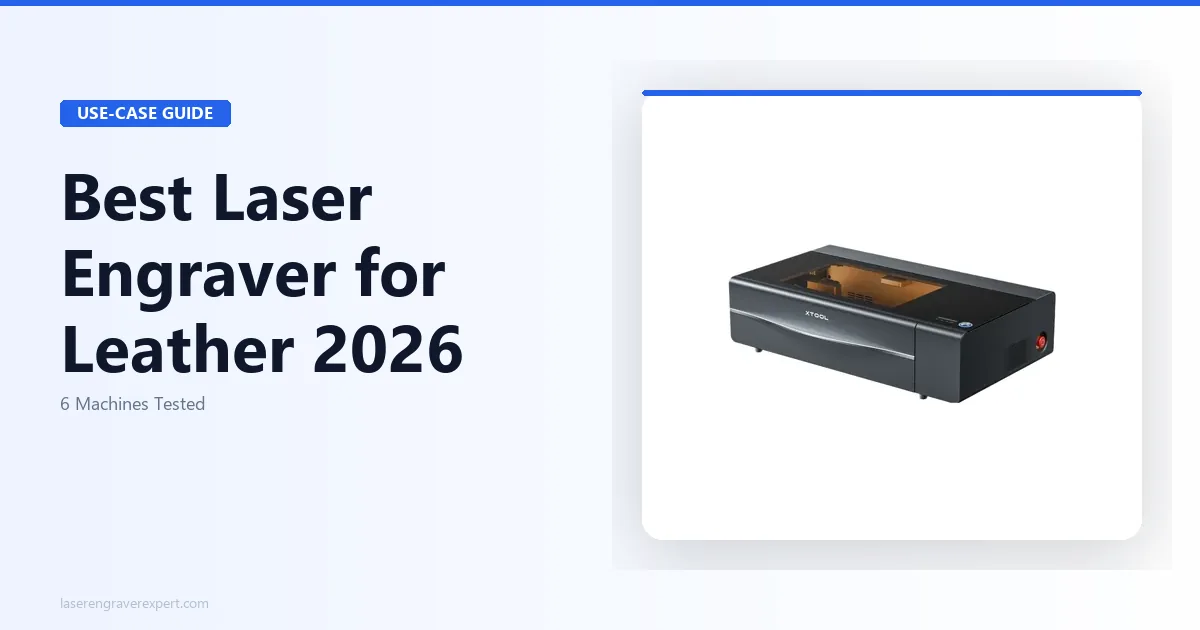
6 Best Laser Engravers for Leather 2026 – Tested & Ranked
Looking for the best laser engraver for leather? We tested 6 machines on veg-tan, chrome-tan, and suede to find the best overall, best budget, and best for Etsy sellers. Updated June 2026.
How to Start a Laser Engraving Business in 2026
Want to start a laser engraving business but don't know where to begin? Here's the exact machine-first breakdown — best niches, machines, real costs, and profit.