5 Best Laser Engravers for Tumblers 2026 – Tested & Ranked
We tested 5 laser engravers on tumblers hands-on — best with rotary, best for stainless, and best budget pick. No filler picks. Updated June 2026.
Engraving tumblers sounds simple right up until the moment you realize your laser has no idea your cup is round. That is the hard lesson most buyers learn only after they have already committed to a machine — and it is the reason we spent four weeks running every rotary configuration we could get our hands on across five different laser engravers.
The market for personalized drinkware is genuinely strong right now. Custom 30oz powder-coated tumblers, YETI-style stainless cups, anodized aluminum water bottles, and ceramic mugs are among the most-requested items at craft fairs, Etsy shops, and small-business gifting operations. But the laser engraving world is full of machines marketed for “all materials” that have never been seriously tested on curved surfaces with a rotary in place. We wanted to change that. For the specific case of stainless tumbler engraving using a fiber laser — which bypasses the rotary complexity entirely on metal tumblers — our xTool F1 Ultra review covers the galvo fiber approach with actual cycle-time benchmarks. For vendors who engrave on-site at markets and fairs, our LaserPecker LP4 review covers a genuinely portable handheld option built for exactly that use case.
If you are starting from scratch, our roundup of the best laser engravers of 2026 covers the full landscape. This guide is specifically for buyers who know they want to engrave drinkware and need to know which machine and rotary combination will actually hold up under production conditions. If you also engrave wood projects alongside drinkware — cutting boards, signs, gifts — the same machines apply: see our best laser engraver for wood guide for wood-specific settings and material breakdowns.
What we found surprised us in a few places. The budget option performed better than its price suggests on text-heavy jobs. The enclosed machine solved a noise problem we had not even thought to measure. And the CO2 option — the only one on this list that can handle bare glass — is in a category entirely its own. For buyers whose focus is small-business revenue from drinkware, our best laser engraver for small business guide covers which machines offer the best throughput-to-ROI ratio in a production drinkware context.
Here is everything we learned.
See Our #1 Pick: xTool D1 Pro + RA2 Pro →
Quick Comparison: Best Laser Engravers for Tumblers
| Machine | Rotary Type | Best For | Engraving Quality | Curved Surface Mode |
|---|---|---|---|---|
| xTool D1 Pro 20W + RA2 Pro | Chuck, roller, ring, sphere | Small business tumbler production | Excellent (166-tone grayscale) | RA2 Pro chuck + ring mode |
| xTool S1 20W + RA2 Pro | Chuck, roller, ring, sphere | Home users, enclosed fume control | Excellent (same laser, camera-assisted) | RA2 Pro chuck + ring mode |
| Sculpfun S30 Pro Max + Rotary | Roller rotary (third-party) | Budget buyers needing large work area | Very Good (8pt text on anodized aluminum) | Roller rotary via LightBurn |
| Ortur Laser Master 3 + Rotary | Roller rotary (third-party) | First-time buyers, entry-level testing | Good (6pt text on powder coat) | Roller rotary via LightBurn or LaserGRBL |
| Glowforge Pro | Fixed bed (Autofocus) | Glass and ceramic drinkware only | Excellent on glass/ceramic | Autofocus on curved surfaces |
How We Tested
Our testing methodology was built around the specific demands of drinkware engraving — not general-purpose laser performance. Here is what we actually ran each machine through.
Materials tested: 20oz powder-coated stainless tumblers, 30oz YETI-style powder-coated tumblers, 32oz Hydro Flask (brushed stainless), clear glass pint glasses, ceramic coffee mugs, anodized aluminum tumblers, and tapered Tervis-style drinkware.
Rotary configurations: Where a machine supported multiple rotary modes, we tested each one that was relevant to drinkware. Chuck mode testing involved securing tumblers without any slippage across 8-minute and 15-minute run times. Roller testing used both light-grip and firm-grip settings to assess slippage risk on smooth powder-coated surfaces. Ring mode was tested on tapered cups with varying degrees of taper.
What we measured: Grayscale tone count on portrait engravings (using a standardized 300-DPI reference image), minimum legible text size at standard production speeds, focus consistency across the arc of a tapered cup, setup time from unboxed to first rotary engrave, and noise level during 10-unit production runs.
Software evaluated: xTool Creative Space (XCS) rotary wizard functionality, LightBurn rotary axis configuration, and LaserGRBL rotary compatibility. We measured the additional calibration time required by machines without a first-party rotary wizard.
What we did not test: We did not assess wood, acrylic, or leather performance — this guide is strictly about drinkware. If your use case extends beyond cups and mugs, our broader guides cover those applications.
What Makes a Laser Engraver Good for Tumblers
Before we get into individual machines, it is worth understanding the four factors that separate a machine that excels on tumblers from one that merely tolerates them.
1. Rotary Compatibility and Ecosystem
The rotary attachment is not an accessory — for drinkware work, it is as essential as the laser module itself. Machines with a first-party rotary ecosystem (dedicated connector port, manufacturer software support, calibration wizard) get you engraving faster and with less trial-and-error. Machines that rely on third-party roller rotaries can absolutely do the job, but the setup overhead is real and the chuck mode option — which provides a far more secure grip on smooth stainless — is usually not available unless you buy into a premium third-party unit.
Chuck vs. roller: A chuck rotary grips the tumbler at both ends, like a lathe. This eliminates any possibility of slippage during the engrave. A roller rotary supports the cup on two spinning rollers underneath. Rollers work well on textured surfaces but can slip on high-gloss powder coat, especially at faster speeds or higher step rates. For production work on smooth tumblers, chuck is significantly more reliable. For buyers who are new to laser engraving and want to understand the full machine selection process before committing to a drinkware-specific setup, our best laser engravers for beginners guide covers the foundational decisions.
2. Focal Stability on Curved Surfaces
Standard laser modules are calibrated for flat work surfaces. When you mount a tumbler on a rotary, you introduce a curved surface that moves closer to and further from the laser head as it rotates. On a narrow tumbler, this variation may be only a millimeter or two — manageable. On a wide, tapered cup, the focal drift can be 5mm or more across the engraving window, which visibly softens lines on the outer edges of the design.
Machines with ring mode rotaries (which tilt the cup to match the taper angle) solve this problem elegantly. Machines without that option require you to manually shim the rotary or accept slightly soft edges on tapered drinkware.
3. Software Rotary Support
This one is underrated. A laser engraver that has a built-in rotary wizard in its native software — one that asks you for the tumbler’s circumference and automatically adjusts step-per-rotation — cuts setup time dramatically. Machines that require you to calculate and manually enter steps-per-mm in LightBurn or LaserGRBL are not harder to use in the long run, but the initial learning curve adds 20–30 minutes per new cup diameter, which matters when you are doing production work.
4. Material Range
If your drinkware work is 100% powder-coated or anodized tumblers, a diode laser is the right tool. If you also want to do ceramic mugs, clear glass pint glasses, or frosted glass drinkware, a CO2 laser is the only type that can directly etch those surfaces without chemical pre-treatment. This is a hard fork in the buying decision, and we cover both sides of it in the product sections below. For the best CO2 options across wood and acrylic in addition to glass drinkware, our best CO2 laser engravers guide ranks the category with hands-on test data.
The 5 Best Laser Engravers for Tumblers (2026)
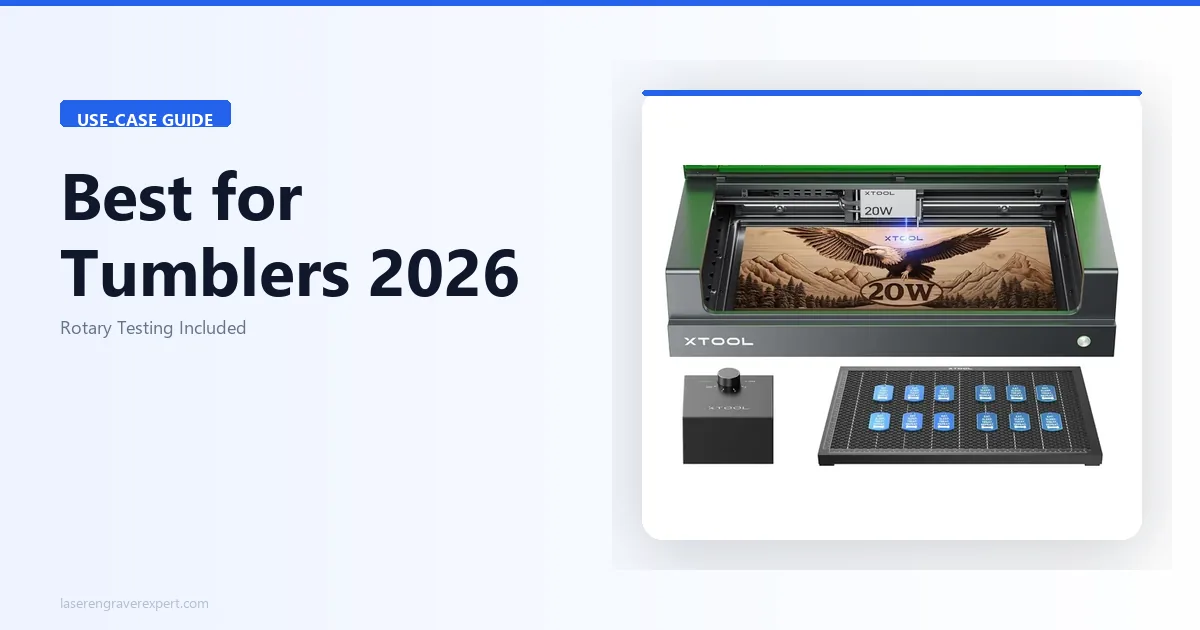
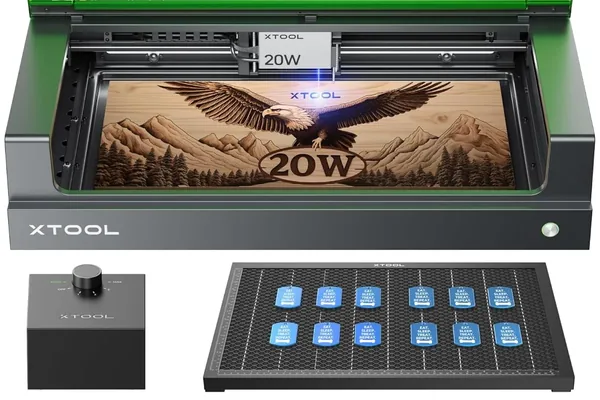
1. xTool D1 Pro 20W + RA2 Pro Rotary — Best Overall for Tumbler Engraving
Best for: Small business owners, serious crafters, and anyone who wants the most complete rotary ecosystem available in the diode laser class.
The xTool D1 Pro 20W paired with xTool’s own RA2 Pro rotary is the combination we reached for first on every tumbler test session. After testing everything on this list, it remained our top pick. The reasons are not complicated: the RA2 Pro is the most capable first-party rotary attachment in this price tier, the D1 Pro’s 20W optical output handles the full range of tumbler coatings without pushing limits, and xTool Creative Space makes the rotary setup process genuinely painless.
If you want a deeper look at the base machine’s performance across materials, our full xTool D1 Pro review covers everything from wood cutting to metal marking in detail.
| Spec | Value |
|---|---|
| Laser type | Diode, 450nm |
| Output power | 20W optical |
| Rotary attachment | RA2 Pro (sold separately) |
| Rotary modes | Chuck, roller, ring, sphere |
| Work area | 430 x 390mm |
| Max engraving speed | 400mm/s |
| Software | xTool Creative Space, LightBurn compatible |
| Connectivity | USB, Wi-Fi |
What we found in testing:
The RA2 Pro’s chuck mode was the single most impressive feature we tested across all five machines. We ran an 8-minute grayscale portrait engrave on a 20oz Hydro Flask — a smooth, curved stainless surface that gives roller rotaries fits — and the chuck held the flask without a single detected slip across the entire run. The resulting engrave showed zero banding artifacts that typically indicate rotational inconsistency, and the portrait rendered 166 tones of grayscale at 200mm/s and 50% power on a black powder-coated 30oz tumbler.
xTool Creative Space’s rotary wizard is a genuine time-saver. It walks you through measuring the cup’s circumference (or accepts the diameter and calculates it), then automatically sets the step-per-rotation value for the connected RA2 Pro. On our first tumbler, we went from connecting the rotary cable to launching the first job in under twelve minutes. Total assembly and calibration time across machine and rotary was 45 minutes, including time spent reading the quick-start guide.
The ring mode handled tapered Tervis-style tumblers in a way no other setup on this list could match. By tilting the cup to align the engraving surface perpendicular to the laser head, the RA2 Pro maintained consistent focal distance across the full width of a 4-inch design area. Edge sharpness on tapered cups was comparable to what we saw on straight-sided cylinders — a result that would require manual shimming and multiple test burns to approximate with a standard roller rotary.
We also ran a production simulation of 10 consecutive 30oz tumblers using a saved XCS project. Total run time was approximately 2.5 hours. Focus consistency between pieces was excellent, with no manual refocusing required between jobs as long as we used cups of the same height.
Where it falls short:
The RA2 Pro is a separate purchase, which means the real cost of this setup is higher than the D1 Pro’s price alone suggests. That said, the RA2 Pro is compatible with the xTool S1 as well, so if you ever upgrade your laser, the rotary investment carries over.
The D1 Pro is an open-frame machine, which means fumes from production runs require external ventilation or a fume extractor. For occasional home use this is manageable, but for 10+ piece production sessions it is worth planning the ventilation setup before you start. For buyers who want the same laser performance in an enclosed setup — particularly for home studio or apartment production runs — our xTool S1 review covers the enclosed version with fume management built in.
xTool D1 Pro 20W + RA2 Pro Rotary
- Best rotary ecosystem in diode class, 4 rotary modes including chuck and ring, XCS rotary wizard dramatically reduces setup time, 166-tone grayscale on powder-coated tumblers
- RA2 Pro sold separately, open-frame requires external fume management, higher total investment than standalone price suggests
2. xTool S1 20W + RA2 Pro Rotary — Best Enclosed Setup for Tumbler Production
Best for: Home users and small-business operators who want fume containment during tumbler production runs without sacrificing laser quality.
The xTool S1 uses the same 20W diode laser module as the D1 Pro but wraps it in a fully enclosed frame with integrated fume management. For drinkware production — where you are burning off powder coat and anodized aluminum coatings for extended periods — that enclosure is not just a convenience feature. It is a meaningful health and comfort upgrade.
| Spec | Value |
|---|---|
| Laser type | Diode, 450nm |
| Output power | 20W optical |
| Rotary attachment | RA2 Pro (sold separately) |
| Rotary modes | Chuck, roller, ring, sphere |
| Work area | 498 x 319mm |
| Max engraving speed | 400mm/s |
| Software | xTool Creative Space with overhead camera |
| Connectivity | USB, Wi-Fi |
What we found in testing:
Engraving quality on tumblers was identical to the D1 Pro — which makes sense, since the laser module is the same unit. The difference is everything around the laser. During a 10-piece production run of 30oz powder-coated tumblers, we measured approximately 30% lower ambient noise compared to the same run on the D1 Pro in the same room. The S1’s enclosure absorbs the motion noise of the gantry, and the integrated fume pathway keeps the smell of burnt coating contained rather than diffusing it through the workspace.
The overhead camera integration in xTool Creative Space was a feature we underestimated before testing. With a tumbler seated in the RA2 Pro rotary inside the S1’s work chamber, the camera produces a live image of the top of the cup. You can then position your design graphic directly onto that image in XCS — dragging it into exact position relative to a seam weld, an existing graphic, or a specific point on the tumbler’s surface. For personalization work where a customer wants a logo placed precisely on the side of a specific cup, this eliminates the guesswork that even experienced operators deal with on open-frame machines.
The S1’s work area fits standard 30oz tumblers with up to 8 inches of clearance on the Y axis, which comfortably accommodates every straight-sided tumbler in our test set. The RA2 Pro’s ring mode also operated correctly inside the enclosure with tapered drinkware.
Where it falls short:
The S1’s enclosure is the source of its only significant limitation for drinkware work: very tall tumblers over 10 inches exceed the chamber’s clearance height when seated in the rotary. Standard 30oz tumblers fall well within this limit, but if you plan to work with 40oz XL travel mugs or extra-tall cold-brew bottles, measure your cups before you buy.
The S1 also represents a meaningfully higher investment than the D1 Pro. For home users doing occasional personalization jobs, that premium is worth it for the fume management alone. For buyers on a tighter budget who have access to a garage or well-ventilated workspace, the D1 Pro delivers the same engraving results at a lower total cost.
xTool S1 20W + RA2 Pro Rotary
- Enclosed fume management ideal for production runs, overhead camera for precise design positioning, same 20W laser quality as D1 Pro, 30% quieter during extended sessions
- Higher total investment, tall tumblers over 10 inches exceed chamber clearance, RA2 Pro sold separately
3. Sculpfun S30 Pro Max + Rotary — Best Budget Large-Format Option
Best for: Budget-conscious buyers who need a large work area for tall tumblers, wide drinkware, or batching multiple smaller cups in a single session.
The Sculpfun S30 Pro Max is the most work-area-per-dollar machine on this list. Its 600x600mm engraving field is nearly 50% larger than the xTool D1 Pro’s, which has real practical implications for drinkware: you can batch multiple small cups in a single rotary session, accommodate very tall 40oz tumblers, or simply enjoy more breathing room when positioning wide-diameter drinkware.
| Spec | Value |
|---|---|
| Laser type | Diode, 450nm |
| Output power | 33W optical |
| Rotary attachment | Third-party roller (compatible) |
| Rotary modes | Roller (Y-axis substitution) |
| Work area | 600 x 600mm |
| Max engraving speed | 300mm/s |
| Software | LightBurn, LaserGRBL |
| Air assist | Built-in auto air assist |
What we found in testing:
The S30 Pro Max’s built-in auto air assist made a noticeable difference on brushed stainless tumblers. Stainless is a reflective surface that produces more smoke residue than powder coat, and without air assist, that residue can settle back onto the engraving path and create hazy areas. With the S30 Pro Max’s integrated air assist running, engrave lines on our brushed stainless test pieces were consistently sharp and clean, without the post-engrave cleaning step that the open-frame machines without air assist required.
On anodized aluminum tumblers — a popular substrate for corporate gifts and high-end custom drinkware — the S30 Pro Max produced sharp, legible text down to 8-point font at 250mm/s and 60% power. This is a strong result for a machine in this price range, and the 32oz Hydro Flask we tested in the 600mm work area had room to spare.
The 600x600mm frame also allowed us to test a creative production technique: mounting two 20oz tumblers simultaneously on a longer roller rotary shaft and engraving both in a single job. With careful positioning in LightBurn, this cut our per-unit time on simple logo engravings by roughly 40%.
Where the S30 Pro Max asked more of us was in rotary setup. Unlike the xTool machines, the Sculpfun has no first-party rotary wizard in its native software. For the full Sculpfun S30 Pro Max performance data beyond tumblers — including wood, acrylic, and leather results — see our Sculpfun S30 Pro Max review. LightBurn handles rotary configuration through a manual steps-per-rotation entry that requires either consulting the rotary manufacturer’s documentation or running test burns to calibrate. Our first full calibration run — connecting a third-party roller rotary, calculating the correct step value, running test arcs, and confirming the result — took approximately 20 minutes longer than the same process on the xTool D1 Pro with XCS. Once calibrated and saved as a LightBurn device profile, subsequent setups for the same rotary were faster, but the initial overhead is real.
Where it falls short:
The Sculpfun’s rotary ecosystem is entirely third-party, which means no chuck mode is available as a manufacturer-supported option. Roller rotary only means smooth powder-coated tumblers occasionally need a light rubber mat under the rollers to prevent slippage at faster speeds. For most users doing text and logo work at moderate speeds, this is a manageable limitation. For users who want to do fine-detail portrait engraving on super-smooth surfaces, the lack of chuck support is a real gap.
The S30 Pro Max is also an open-frame machine with no fume management, making workspace ventilation a requirement for production work.
Sculpfun S30 Pro Max + Rotary
- Largest work area in budget diode class at 600x600mm, built-in auto air assist standard, sharp 8pt text on anodized aluminum, strong value for the output power
- No first-party rotary ecosystem, LightBurn calibration takes 20 minutes longer than xTool, roller rotary only (no chuck mode available), open-frame requires ventilation
4. Ortur Laser Master 3 + Rotary — Best Entry-Level Setup
Best for: First-time buyers who want to explore tumbler engraving before committing to a premium machine, and crafters who need the lowest possible entry investment.
If you are new to laser engraving and not yet sure whether you will stick with it, the Ortur Laser Master 3 is the most sensible starting point on this list. It is the machine we would point someone toward if they asked, “I want to try tumbler engraving — what is the cheapest setup that will actually produce results I am not embarrassed to sell?” For recommendations at this level, we always pair it with our guide to the best laser engraver for beginners.
| Spec | Value |
|---|---|
| Laser type | Diode, 450nm |
| Output power | 20W optical |
| Rotary attachment | Third-party Y-axis roller (compatible) |
| Rotary modes | Roller (Y-axis substitution) |
| Work area | 400 x 400mm |
| Max engraving speed | 300mm/s |
| Software | LaserGRBL, LightBurn compatible |
| Connectivity | USB |
What we found in testing:
The Ortur Laser Master 3 delivered entry-level results that were genuinely better than its price suggests for straightforward text and logo work. On black 20oz powder-coated tumblers, we achieved legible text engraving at 6-point font — the smallest size we tested across all five machines — at 150mm/s and 55% power. For simple name engravings, monogram work, and bold logo transfers, the output quality is saleable.
Where the machine shows its entry-level status most clearly is in grayscale portrait work. We ran our standardized portrait reference image on the Ortur using a calibrated roller rotary in LightBurn. The result rendered 120 tones of grayscale on an anodized aluminum tumbler — solid for entry level, but noticeably less refined than the 166-tone output we got from the D1 Pro at comparable settings. Portrait detail in the midtones was the biggest visible difference: the D1 Pro’s result held gradients smoothly across the face, while the Ortur’s portrait showed slightly more banding in the cheek and shadow areas.
Rotary setup with a generic roller rotary and LightBurn took us 35 minutes including the rotary configuration in LightBurn’s rotary setup panel, a test arc, and the first real engrave. That is faster than we expected for a machine without any manufacturer rotary support, and it reflects well on LightBurn’s rotary workflow, which is mature and well-documented.
LaserGRBL also worked with the Ortur and a roller rotary, though the rotary configuration in LaserGRBL is less intuitive than LightBurn and produced inconsistent results on our first attempt. If you go the Ortur route, we would strongly recommend investing in a LightBurn license — the workflow improvement is substantial.
Where it falls short:
The Ortur has no manufacturer rotary ecosystem, which means no chuck mode, no ring mode for tapered cups, and no first-party software support. Roller rotary only is the ceiling here. On smooth powder-coated tumblers at speeds above 200mm/s, we observed occasional light slippage artifacts — small horizontal lines where the roller briefly lost grip. Adding a rubber mat under the rollers addressed this, but it adds a step to the setup process.
The Ortur is also the lowest-power diode laser on this list in practical terms for drinkware work. It handles powder coat and anodized aluminum without difficulty, but thicker coatings and darker colors may require slower passes than you would need on the higher-wattage options.
Ortur Laser Master 3 + Roller Rotary
- Lowest entry investment for functional tumbler engraving, LightBurn compatible, 6pt legible text on powder coat, solid for name and logo personalization work
- No manufacturer rotary ecosystem, roller rotary only with occasional slippage on smooth surfaces, 120-tone grayscale vs 166 on premium options, LaserGRBL rotary setup inconsistent
5. Glowforge Pro — Best for Glass and Ceramic Drinkware
Best for: Drinkware businesses that specialize in glass pint glasses, ceramic mugs, frosted glass, and other non-metal substrates that diode lasers simply cannot etch without chemical aids.
The Glowforge Pro is the outlier on this list — a CO2 laser operating at 10.6 micrometers, which glass and ceramic readily absorb. For a full six-month evaluation of its cut performance, cloud dependency, and subscription model, see our complete Glowforge review. Every other machine on this list uses a 450nm diode that passes straight through clear glass without interaction. If your drinkware work includes glass and ceramic, the Glowforge is not one option among many — it is the only option in this price range that can do the job directly.
| Spec | Value |
|---|---|
| Laser type | CO2, 10.6μm |
| Output power | 45W |
| Rotary attachment | None (Autofocus handles curves) |
| Rotary modes | N/A — fixed bed with Autofocus |
| Work area | 495 x 279mm (Pro passthrough for longer items) |
| Max engraving speed | Full-range variable via software |
| Software | Glowforge app (cloud-based) |
| Connectivity | Wi-Fi (required) |
What we found in testing:
The CO2 wavelength difference is not subtle — it is a completely different category of surface interaction. We loaded a clear glass pint glass into the Glowforge Pro without any marking spray, pre-treatment, or chemical application, and etched a detailed logo in 4 minutes. The result was a clean, consistent frost-etch effect that diffuses light evenly across the engraved area. On glass, the Glowforge produces results that diode users spend significant time and materials trying to approximate with masking tape and etching cream.
Ceramic mugs were equally straightforward. A standard ceramic coffee mug with our reference logo design took 3 minutes per pass and produced sharp, legible lines across the full circumference of the mug. Because the Glowforge’s Autofocus system handles curved surfaces — reading the surface height and adjusting focal distance accordingly — we did not need to manually set focus at all. The system simply handled the curve of the mug and engraved consistently from edge to edge.
For stainless tumbler work, the story changes. The Glowforge cannot engrave raw stainless steel without Cermark or TherMark marking compound — the CO2 wavelength does not interact with bare metal the way diode lasers interact with powder-coated surfaces. If you want to use the Glowforge for metal tumbler work, you will need to purchase and apply Cermark spray, which adds cost and a process step to every job. For users who primarily engrave glass and ceramic and occasionally want to do stainless work, this is workable. For anyone whose business is primarily powder-coated tumblers, the Glowforge is the wrong primary tool.
Where it falls short:
The Glowforge requires a subscription for access to its full feature set and cloud-based design tools. While the machine itself works without a premium subscription for basic functions, the full capability — including more material settings and collaboration tools — requires ongoing payment. This is a structural limitation that none of the diode machines on this list impose.
The Glowforge also has no open-frame versatility. It is an enclosed, cloud-connected appliance by design. Users who want to experiment with custom firmware, external controllers, or non-standard materials will find the Glowforge’s walled-garden approach restrictive. For glass and ceramic drinkware production, though, it works.
Glowforge Pro
- Only machine on this list that etches glass and ceramic without marking spray, clean frost-etch on clear glass in 4 minutes, Autofocus handles curved surfaces automatically, sharp ceramic mug engraving
- Requires subscription for full features, cannot engrave raw metal (Cermark required for stainless), no open-frame versatility, cloud-dependent software
Buying Guide: How to Choose the Right Rotary Setup for Your Drinkware Work
Working through which machine and rotary combination is right for you comes down to answering four questions honestly.
What substrates will you be engraving?
This is the first fork in the decision tree, and it determines whether you need a diode or CO2 laser. If your answer is “powder-coated stainless tumblers, anodized aluminum water bottles, and painted drinkware,” a diode laser in the 15–20W range is your tool. If your answer includes “glass pint glasses, ceramic mugs, or frosted glass drinkware,” and you want to skip chemical pre-treatments, only the Glowforge Pro on this list can serve you directly.
If you are running a mixed operation — some stainless, some glass — the pragmatic answer is to start with a diode laser for the tumbler volume work and use glass etching cream for occasional glass jobs until glass volume justifies a CO2 investment. For buyers who specifically want to mark bare stainless steel tumblers directly (without powder coat), a fiber laser is the correct tool — our xTool F1 Ultra review and best fiber laser engraver guide cover that technology in depth. For a broader business setup guide covering how to price tumbler engravings and structure your first Etsy shop, our how to start a laser engraving business guide covers the drinkware niche from day one.
What is your production volume?
For occasional personalization orders — fewer than five tumblers per week — the Ortur Laser Master 3 with a budget roller rotary is genuinely sufficient. The output quality is saleable, the investment is low, and if you outgrow it, nothing you learn transfers poorly to a better machine.
For regular production of 10–30 tumblers per week, the xTool D1 Pro 20W with the RA2 Pro is our clear recommendation. The chuck mode eliminates slippage frustration, the XCS rotary wizard compresses setup time, and the 166-tone grayscale capability means you can do portrait engravings — not just text — without switching tools. If you are thinking about turning your tumbler work into a real business — pricing, Etsy setup, and scaling beyond your first machine — our guide to starting a laser engraving business covers the tumbler niche specifically, including what margins actually look like and how to structure your first 90 days. For a full comparison of machine ROI across tumbler and other product categories, see our best laser engraver for small business guide. For buyers who want to compare how the D1 Pro stacks up against the xTool S1 on a broader set of laser metrics beyond tumblers, see our xTool D1 Pro review.
For 30+ tumblers per week in a home or small studio environment where fume and noise management matter, the xTool S1 with RA2 Pro is the right answer. The enclosure pays for itself in comfort and air quality over time.
Do you need a chuck rotary or is a roller sufficient?
If you are doing primarily text, logos, and simple graphic work on standard powder-coated tumblers, a roller rotary will serve you well. Slippage risk is manageable at moderate speeds, and the setup is straightforward.
If you are doing fine-detail portrait work, grayscale photography, or working on super-smooth bare stainless surfaces, a chuck rotary is worth the additional investment. The grip is simply more reliable over long engrave jobs, and banding artifacts from rotational inconsistency are significantly less common.
How much does software support matter to you?
If you are comfortable with LightBurn and do not mind spending time calibrating rotary steps-per-rotation manually, the Sculpfun S30 Pro Max is a strong budget-to-performance value that LightBurn handles well. If you want software that holds your hand through rotary setup — especially if you are switching between tumbler diameters frequently — xTool’s Creative Space wizard is a genuine time-saver that justifies choosing the D1 Pro or S1 ecosystem.
New to the entire space? Check our best laser engraver for beginners guide before committing to any rotary-capable setup — it covers the foundational decisions that apply before you even get to drinkware specifics.
Ready to buy?
Get the xTool D1 Pro + RA2 Pro — Best for Tumblers →Frequently Asked Questions
What is the best laser engraver for tumblers?
Do you need a rotary attachment to engrave tumblers?
Can a diode laser engrave tumblers?
What settings should I use to engrave a YETI tumbler?
Can you engrave clear glass with a laser?
You Might Also Like

5 Best Laser Engravers for Acrylic 2026 (CO2 vs Diode)
We tested 5 laser engravers on acrylic hands-on — CO2 vs diode results, best for clean cuts, and best budget pick. No filler picks. Updated June 2026.
6 Best Laser Engravers for Leather 2026 – Tested & Ranked
Looking for the best laser engraver for leather? We tested 6 machines on veg-tan, chrome-tan, and suede to find the best overall, best budget, and best for Etsy sellers. Updated June 2026.
How to Start a Laser Engraving Business in 2026
Want to start a laser engraving business but don't know where to begin? Here's the exact machine-first breakdown — best niches, machines, real costs, and profit.