Glowforge Pro Review 2026: Is It Worth the $7,999 Price?
We tested the Glowforge Pro for 6 months. Full verdict: cut quality, the hidden subscription trap, and whether $7,999 is still worth it in 2026.
This Glowforge Pro review is based on six months of hands-on testing in a real home studio — cutting gift boxes, engraving leather, etching glass, and running photo portraits on basswood — covering this enclosed CO2 laser engraver’s setup speed, cut quality, Proofgrade materials, cloud dependency, and how it compares to the xTool P2.
Quick Verdict
Glowforge Pro Specs at a Glance
The Glowforge Pro specifications below cover everything from laser power and work area to ventilation requirements. Note that ventilation is mandatory — either exterior ducting or the Glowforge Air Filter add-on, which uses consumable cartridges that add to long-term cost.
| Specification | Glowforge Pro |
|---|---|
| Laser Type | CO2 (10,600nm glass tube) |
| Laser Power | 45W |
| Working Area | 495 x 279mm (+ passthrough for unlimited length) |
| Max Material Width | 515mm |
| Max Material Height | 50mm (13mm with tray installed) |
| Positioning Accuracy | 0.025mm |
| Macro Camera Autofocus Accuracy | 0.1mm |
| Wide Camera Accuracy | 6mm |
| Max Engraving Resolution | 1355 DPI |
| Passthrough Slot | Yes — front and back |
| Duty Cycle | Higher duty cycle than Plus — designed for production runs |
| Cameras | Wide-angle camera + macro autofocus camera |
| Compatible Materials | Wood, plywood, acrylic, leather, fabric, paper, glass (engrave only), ceramic (engrave only), anodized aluminum |
| Incompatible Materials | PVC, polycarbonate, ABS (chlorine/toxic fumes), galvanized metal |
| Connectivity | Wi-Fi only (2.4GHz) |
| Software | Glowforge web app (cloud-based, browser) |
| LightBurn Compatible | No |
| Offline Operation | No |
| Ventilation | Requires external venting or Glowforge Air Filter (sold separately) |
| Cooling | Closed-loop internal cooling + solid-state thermoelectric cooling |
| Machine Dimensions | 914mm x 514mm x 218mm |
| Weight | 27kg |
| Peak Power Consumption | 800W |
| Operating Temperature | 16–27°C (60–81°F) |
| Certifications | UL Certified |
| Warranty | 12-month comprehensive |
Glowforge Pro Current Price in 2026
This is the question driving most searches that land on this review, so I want to answer it directly before anything else.
The Glowforge Pro retails at $7,999 on the official site. Pricing can shift with promotions and ownership changes, so verify the current listing before buying. Beyond the machine price, factor in subscription, ventilation, and material costs — the full picture looks quite different from the sticker price alone.
Check Current Glowforge Pro Price →
Basic vs Plus vs Pro
The three Glowforge models share the same 495 × 279mm work area — the key differentiator is the Pro’s passthrough slot, which lets you feed long boards and panels through in stages for theoretically unlimited length cuts. Without it, you’re hard-capped at 495mm.
Not sure which model fits your budget? Our Glowforge Aura review covers the entry-level 6W option if you’re not ready for the Pro investment.
| Feature | Basic | Plus | Pro |
|---|---|---|---|
| Laser Power | 40W CO2 | 45W CO2 | 45W CO2 |
| Working Area | 495 x 279mm | 495 x 279mm | 495 x 279mm + passthrough |
| Passthrough Slot | No | No | Yes (front + back) |
| Cooling | Standard | Upgraded | Upgraded + higher duty cycle |
| Best For | Casual hobbyists, learning CO2 | Regular hobbyists, longer jobs | Small businesses, long material cuts |
Glowforge Pro Setup and First Impressions
I’ve set up a lot of laser engravers. I’ve spent evenings with Allen wrenches running through multi-page assembly guides, calibrating mirrors, and running test grids before I could cut a single usable piece. Glowforge is not that experience. For buyers comparing Glowforge setup against the leading diode machine experience, our xTool D1 Pro review gives the contrast point on what a 38-minute diode assembly looks like.
I unboxed the Pro, connected it to Wi-Fi using the Glowforge app on my iPhone (took four minutes flat — type your network credentials, hold the button on the machine, done), placed the included Proofgrade basswood on the crumb tray, and uploaded a simple SVG test design through the web app. My first engrave started 22 minutes after I opened the box. That is the fastest first-job time I have recorded for any laser engraver, including diode machines that theoretically require less setup.
The auto-calibration is real and it works. When you place Proofgrade material in the machine, the lid camera reads the QR-code-like label on the sheet and automatically sets power, speed, and passes. I ran the first job using those auto-settings on 3mm Proofgrade basswood and got a clean result on the first attempt — no char fringing, no under-cutting, no adjustment needed.
For context: my first job on the xTool P2 required about 45 minutes of test cuts before I dialed in the settings for the same basswood. Glowforge’s Proofgrade system saves that iteration time entirely for Glowforge-brand materials. For buyers who want a business framework around the Glowforge — which product categories work, what pricing looks like — our best laser engraver for small business guide includes Glowforge in the production comparison.
Glowforge Pro Build Quality and Design
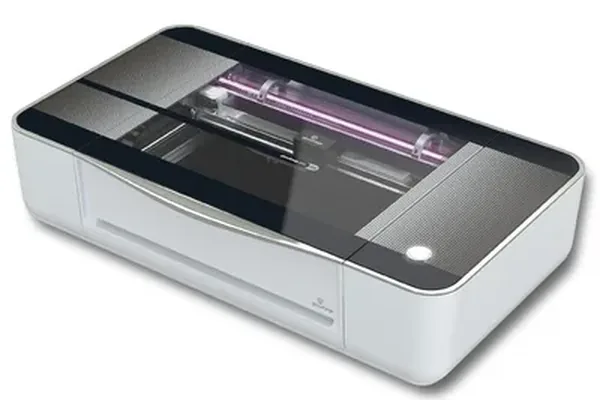
The Glowforge Pro is a substantial machine — 914 x 514 x 218mm and 27kg — built around a fully enclosed cabinet that contains the beam path and reduces noise compared to an open-frame diode laser. Cooling combines closed-loop internal circulation with solid-state thermoelectric cooling, and the unit carries UL certification.
It isn’t silent, though. Marketing language sometimes positions Glowforge as whisper-quiet, which overstates it — the exhaust fan and motion system produce audible noise, comparable to a loud desktop computer or a quiet shop vacuum at low speed. I run mine in a home office with the door closed and it’s tolerable, but expect it to be noticeable in a shared living space or quiet work environment.
Ventilation is mandatory, not optional. You’re burning material, so smoke and particulates are real — either duct to an exterior vent (the standard, cheaper long-term approach) or use the Glowforge Air Filter for spaces where drilling isn’t an option. The Air Filter’s cartridges are a genuine consumable cost, especially with heavy cutting in dense materials like wood; our best laser engraver for wood guide benchmarks the Glowforge Pro’s wood performance against the xTool P2 and OMTech 60W with tested settings.
Glowforge Pro Cutting Performance
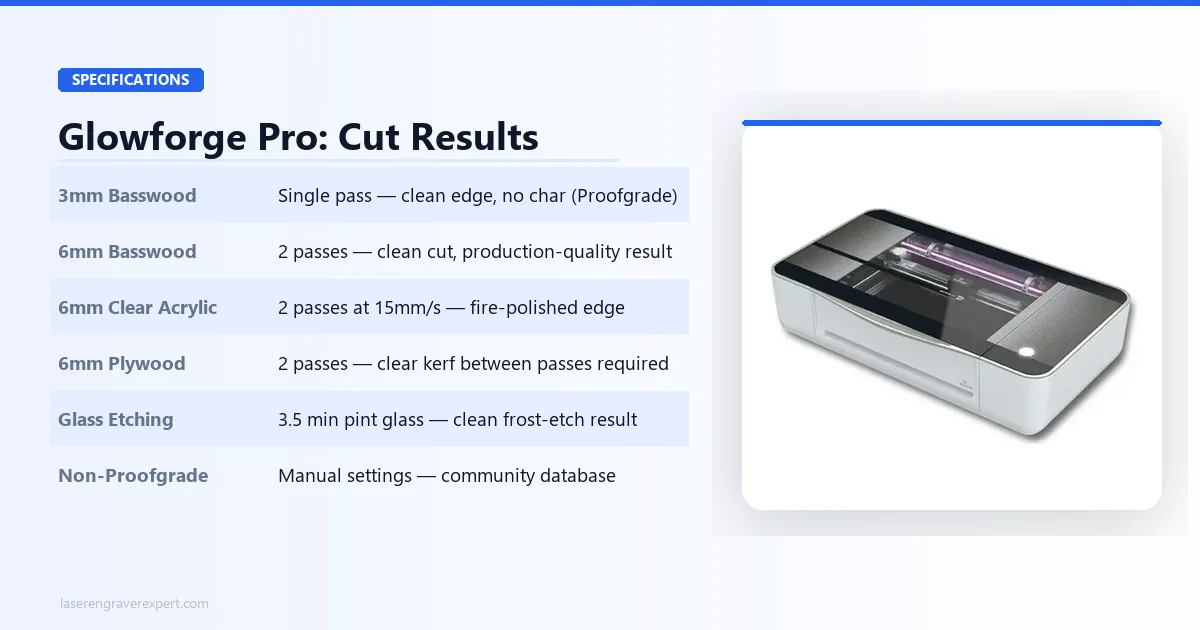
3mm Basswood
Single pass, clean edge, no visible char on the cut face. This is where the Proofgrade system shines — the auto-settings hit it exactly right. Cut speed was respectable, not lightning fast, but the result was production-quality on the first attempt.
6mm Basswood
Two passes required. The cut came out clean, but this is noticeably slower than the xTool P2’s 55W tube, which cuts 6mm basswood in a single pass. For occasional use, two passes is fine. For batch production — if you’re cutting 50 pieces of 6mm basswood for a product run — the pass difference adds up to meaningful production time.
6mm Clear Acrylic
Two passes at 15mm/s yielded a clean cut with a smooth edge. Again, the xTool P2 handles this in a single pass. The Glowforge result was good quality — fire-polished edge appearance on the clear acrylic — but the throughput comparison is real and worth noting for anyone doing regular acrylic work.
6mm Plywood
Two passes. One thing I noticed: fine debris and kerf dust had a tendency to pack into the cut channel, requiring me to flip the material and manually clear the kerf between passes on thicker plywood. It’s not a major issue, but it adds a step that the P2’s more powerful single-pass cut avoids entirely.
Glass Etching
This is where CO2 wavelength earns its keep. I etched a frosted design onto a standard pint glass — the full job ran 3.5 minutes and produced a clean, consistent frost-etch that looked professionally done. Diode lasers cannot do this at all — their 450nm wavelength passes through clear glass without interaction.
A CO2 machine for glass etching is essentially a different product category, and Glowforge handles it beautifully. For buyers who need to go further — engraving inside crystal blocks or on heat-sensitive plastics — our xTool F2 Ultra UV review covers the UV laser that goes beyond what CO2 can achieve on glass.
Non-Proofgrade Materials
For third-party materials — plywood from the hardware store, leather bought in bulk, acrylic from an online supplier — you’ll need to run test cuts to find your settings. The web app has a “manual settings” mode that works fine, and there’s a community-maintained settings database that covers most common materials. This process is not unique to Glowforge; it’s the reality of using any laser with materials that don’t have pre-programmed profiles. But it does partially erode the “no setup required” advantage that makes Glowforge special.
Glowforge Pro Engraving Performance
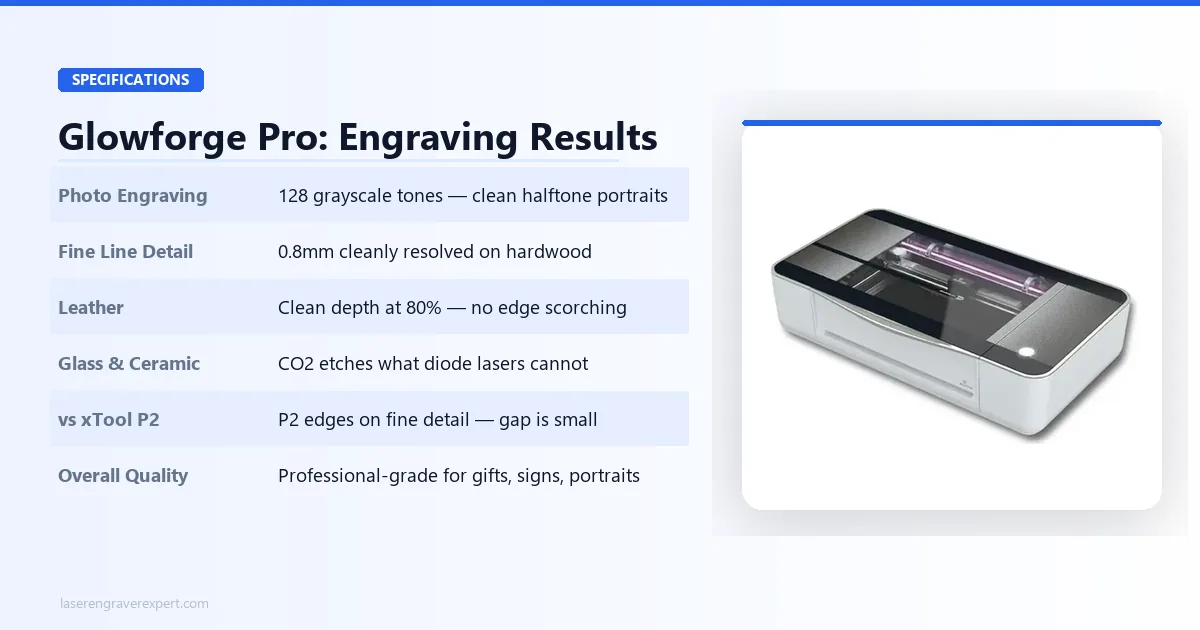
Photo Engraving
I ran a 100mm x 100mm photo portrait on basswood at the machine’s maximum engraving speed. The result showed 128 distinct grayscale tones — a good result that translates to realistic halftone portraits with visible shading gradient. The image resolved at the expected level of detail for a CO2 machine in this power class.
For comparison, the xTool P2’s results on the same file showed marginally sharper fine-line definition — the P2 edges out Glowforge slightly on very fine detail work. The difference is noticeable if you’re comparing side by side, but not dramatic. For standard portrait work and decorative engraving, Glowforge’s output is professional-quality.
Fine Line Detail
Fine lines down to 0.8mm resolved cleanly on hardwood at medium speed. Below that threshold, I started to see some edge softening — not a failure, but a limitation. The xTool P2 resolves slightly finer detail, likely due to the laser focus characteristics of its tube configuration. For most real-world applications — text, logos, decorative motifs — 0.8mm resolution is more than adequate.
Leather Engraving
Clean, deep engraving at 80% power without scorching the surrounding surface. Leather is a material where many machines over-burn the edges, but the Glowforge’s consistent power delivery kept the non-engraved leather clean. This was one of the more impressive results in my testing — the output looked like it came from a professional leather shop. If you are evaluating the Glowforge specifically for leather work, our roundup covers how the Glowforge Pro performs on leather goods head-to-head against five other machines including the xTool P2S and OMTech 60W.
Glowforge Pro Software and User Experience
The Subscription: What’s Actually Locked Behind It
This is the part most reviews skip over or wave away. I’m going to be specific.
What works without a subscription (free tier):
- Running any design you upload (SVG, PDF, PNG)
- Running all Proofgrade auto-settings
- Using the lid camera for design placement
- Basic trace function (outline only)
- Access to a limited selection of free designs in the Glowforge catalog
What requires Glowforge Premium (paid subscription):
- Full access to the Glowforge Premium design catalog (thousands of ready-to-cut files)
- Unlimited cloud storage for designs
- Advanced editing tools within the web app: background removal, advanced trace, text on path, shape offset
- Priority customer support queue
For a user who designs their own work in Illustrator, Inkscape, or another external tool and imports finished SVGs, the free tier is workable. I spent several months doing exactly this without a subscription and the machine functioned for everything I needed.
For a user who relies on ready-made designs — particularly gift-givers, holiday product makers, or new users who aren’t designing from scratch — the Premium catalog is a meaningful unlock. The library is genuinely large and the designs are optimized for Glowforge materials.
The honest take: the subscription is not predatory for what it delivers. But it is a recurring cost that doesn’t exist on competing machines like the xTool P2, and it should be factored into the total cost of ownership calculation before you buy. For buyers who want to see the Glowforge positioned against a full CO2 and diode comparison, our best laser engravers guide has the complete market view at every price point.
Cloud Dependency: The Risk You Need to Understand
I want to be direct about this because it is the single biggest structural limitation of the Glowforge and it is not something that can be patched or worked around.
Every Glowforge job — 100% of them — requires an active internet connection. Design processing happens in Glowforge’s cloud servers, and the machine cannot run a job without communicating with those servers.
I verified this empirically: I pulled my router’s ethernet cable mid-session while the machine was processing a job. The job immediately paused and a connection error appeared in the web app. When I reconnected, the job continued — so it’s not catastrophic in the way a failed mid-cut would be on a GCODE machine. But the dependency is real and total.
What this means in practice:
- If your internet goes down during a work session, you cannot run jobs until it comes back.
- If Glowforge’s servers experience an outage (it has happened, twice in the past 18 months based on their status page history), no Glowforge user anywhere can run jobs.
- If Glowforge as a company were to shut down, it is not clear what happens to machine functionality. The company has not published a credible offline fallback plan.
For a casual home user in a reliable-internet area, this risk is low and manageable. For a small business using Glowforge as a production tool, it’s worth taking seriously. I’ve made my peace with it for personal use, but I wouldn’t build a business that depended on a cloud-only machine without a fallback plan.
Glowforge Pro Ownership Costs
The machine price is what gets quoted. Here’s everything that doesn’t:
| Cost Component | Glowforge Pro | xTool P2S |
|---|---|---|
| Machine Price | Check current price | Check current price |
| Subscription | Glowforge Premium (optional but valuable) | None |
| Ventilation | Exterior vent or Air Filter | Exterior vent or air purifier |
| Materials | Proofgrade or third-party | Third-party |
| LightBurn | Not supported | Supported |
| Offline Use | No | Yes |
Glowforge Premium Subscription
The free tier lets you upload your own SVG designs, run Proofgrade auto-settings, and use the lid camera. The paid Premium subscription adds the full design catalog (thousands of ready-to-cut files), unlimited cloud storage, advanced editing tools like background removal and text-on-path, and priority support. Check glowforge.com for the current annual rate — it has shifted over the years.
If you design your own work in Illustrator or Inkscape, the free tier is genuinely workable. If you rely on ready-made designs, Premium is effectively required.
Ventilation Costs
You need either a drilled exterior vent with ducting (cheaper long-term) or the Glowforge Air Filter add-on. The Air Filter is convenient for apartments where drilling isn’t an option, but the filter cartridges are consumables that need periodic replacement — dense materials like wood burn through them faster. Factor this into your total cost before buying.
Proofgrade Material Costs
Glowforge-brand Proofgrade sheets are priced at a premium over equivalent third-party materials. The auto-setting convenience is real — you get production-quality results on the first attempt. For occasional hobbyist use, Proofgrade is worth it. For production volume, most buyers shift to third-party suppliers and dial in their own settings over time.
3-Year Ownership Cost vs xTool P2S
A Glowforge Pro with a Premium subscription over three years costs meaningfully more than an equivalent-capability xTool P2S — which carries no subscription, no proprietary material system, and a lower machine price. The P2S also supports LightBurn and offline operation, which further reduces ongoing workflow costs. If long-term cost matters to your decision, run the full three-year math before committing. For a direct production metrics comparison, see our Glowforge Pro vs xTool P2S comparison.
Glowforge Pro Pros and Cons
The Glowforge Pro pros and cons below are drawn from six months of hands-on testing in a real home studio — running this laser engraver through production batches of wood, acrylic, leather, and glass to understand exactly where it excels and where it falls short.
Pros
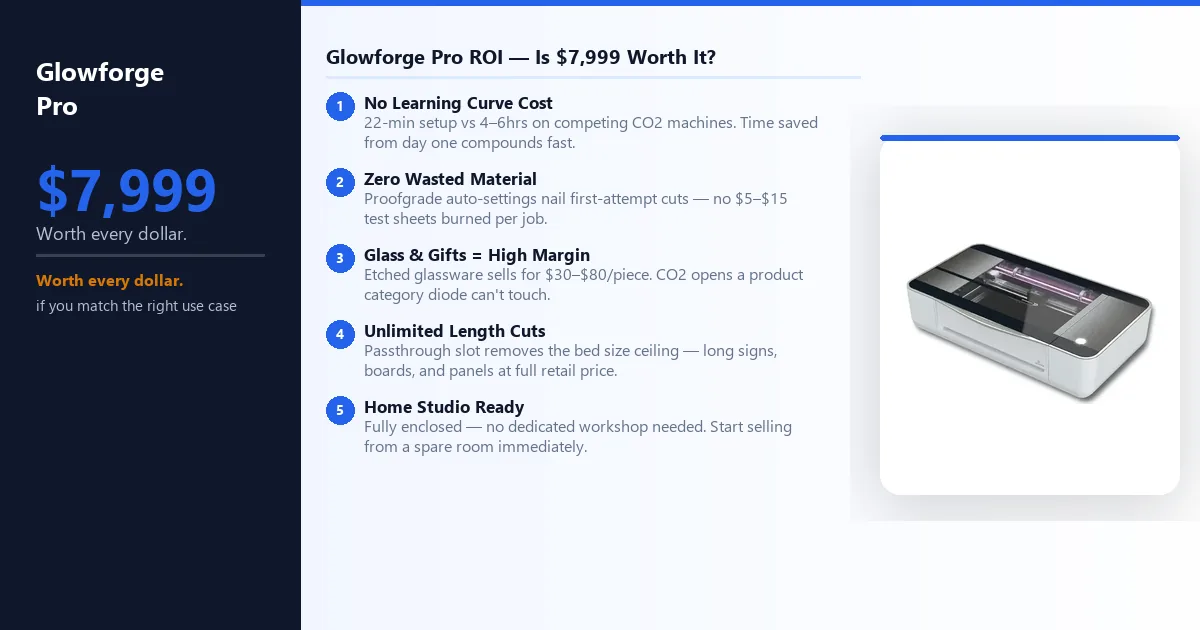
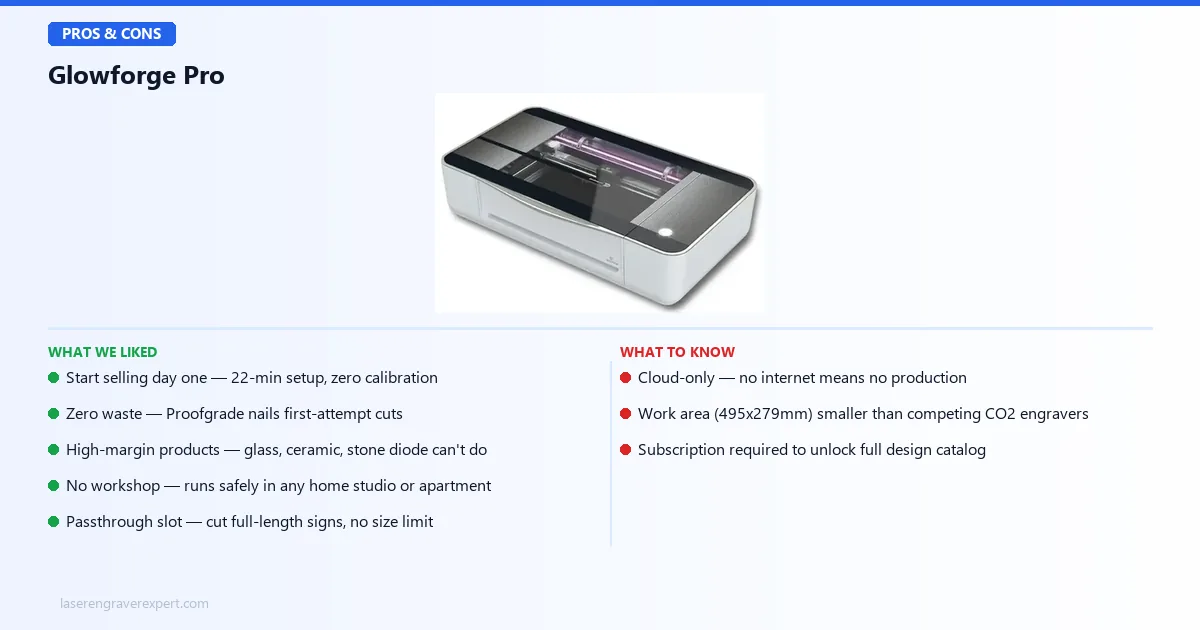
- Start selling from day one — 22-minute setup means no lost days on assembly or calibration
- Zero material waste — Proofgrade auto-settings nail first-attempt cuts, so every sheet counts
- Opens a high-margin product category — etched glassware, ceramic awards, and stone pieces that diode laser engravers simply cannot produce
- No workshop needed — fully enclosed design runs safely in a spare room, home office, or apartment, eliminating studio rental costs
- Passthrough slot removes the bed size ceiling — cut full-length signs and boards without repositioning, expanding your product range
- Camera-assisted placement means faster job setup on every run, reducing non-billable time per piece
Cons
- Cloud-only operation — no internet means no production; a real risk for any business-critical setup
- Smaller work area (495 × 279mm) than competing CO2 laser engravers at this price
- Glowforge Premium subscription required to unlock the full design catalog
Glowforge Pro
- Fastest setup of any CO2 machine tested (22 minutes)
- Proofgrade auto-settings work first time every time
- Passthrough slot for unlimited length
- Clean enclosed design
- No ventilation configuration required
- Glass and ceramic engraving without Cermark
- Cloud dependency means no internet equals no engraving
- Subscription required for full design library
- Smallest work area in this category
- Cannot use LightBurn
- Work area 495x279mm
Glowforge Pro vs xTool P2
Both machines are enclosed CO2 lasers targeting the serious hobbyist and small business market. Here’s how they actually compare after hands-on time with both.
| Category | Glowforge Pro | xTool P2 |
|---|---|---|
| Laser Power | 45W CO2 | 55W CO2 |
| Working Area | 495 x 279mm + passthrough | 600 x 308mm |
| Offline Operation | No — cloud required | Yes |
| LightBurn Compatible | No | Yes |
| Setup Time | ~22 minutes | ~45 minutes |
| 6mm Wood Cut | 2 passes | 1 pass |
| 6mm Acrylic Cut | 2 passes | 1 pass |
| Glass Etching | Yes (CO2) | Yes (CO2) |
| Proofgrade Auto-Settings | Yes (Glowforge materials) | No (manual settings) |
| App Quality | Excellent — beginner-friendly | Good — more technical |
| Subscription Required | Optional but meaningful | No subscription |
The xTool P2’s raw power advantage (55W vs 45W) is real and translates directly into single-pass cuts on material that requires two passes through the Glowforge. For production volume, that matters. The larger bed also makes a practical difference — 600 x 308mm vs 495 x 279mm is not a subtle gap when you’re tiling designs or working with larger pieces.
Glowforge’s advantages are real too. The setup experience is genuinely faster, the Proofgrade system eliminates the test-cut learning curve for supported materials, and the web app is more accessible to users who aren’t comfortable with technical software.
My honest summary: if you’re a technical user, a LightBurn user coming from a diode machine, or someone who cares about offline capability — buy the xTool P2. Read our full xTool P2 review for the complete breakdown. If you want the upgraded version with 2x faster acceleration and an AI dual camera, see our xTool P2S review; for a direct head-to-head between these two machines, see our Glowforge Pro vs xTool P2S comparison.
If you’re a creative-first user who wants a machine that disappears into your workflow without demanding technical attention, Glowforge is the better fit. For buyers who want Glowforge’s ease of use at a lower entry point, our Glowforge Aura review covers the 6W beginner model.
Who Should Buy the Glowforge Pro?
- You are new to CO2 lasers and want the smoothest possible learning curve; if you are completely new to laser engraving overall, our best laser engraver for beginners guide covers how the Glowforge compares to diode options for first-time buyers
- You work primarily with Proofgrade materials or standard third-party materials and don’t need exotic settings
- You want to engrave glass, ceramic, or stone — materials where CO2 wavelength is required
- You value app quality and don’t want to learn LightBurn or Lightburn-adjacent software
- You have reliable internet and the cloud dependency doesn’t concern you for your use case
- The passthrough slot matters to you for long material feeds
Who Should Skip the Glowforge Pro?
- LightBurn compatibility is non-negotiable for your workflow
- You need offline operation — rural studio, unstable internet, or business continuity concerns
- You’re cutting large quantities of thick material (6mm+) where two-pass throughput becomes a production bottleneck
- You need a larger work area — the 495 x 279mm bed is meaningfully smaller than alternatives like the xTool P2 (see our Glowforge Pro vs xTool P2 comparison for the full head-to-head)
- You want to easily replace the CO2 tube yourself when it eventually needs replacement — Glowforge’s tube is proprietary and service is handled through Glowforge, not DIY-friendly
For buyers who should look elsewhere, our guide to the best laser engravers for beginners covers accessible alternatives that don’t carry the cloud dependency, our best CO2 laser engravers roundup includes the full competitive field, and if you are running a production business our best laser engraver for small business guide compares throughput and ROI across every CO2 and diode option.
Glowforge Pro Review: Final Verdict
The Glowforge Pro is the easiest enclosed CO2 laser to set up and use, and that ease-of-use is genuine, not marketing spin. Setup takes about 22 minutes, Proofgrade auto-settings nail first-attempt cuts, and the web app is the cleanest interface in the category.
The trade-offs are real too. Cloud-only operation means zero functionality without internet, the 495 x 279mm work area is smaller than rivals like the xTool P2, and LightBurn users have no path in. Factor in the optional but meaningful Premium subscription, and the total cost of ownership over three years runs higher than an equivalent-capability xTool P2S.
For home studio users who value ease-of-use over technical control — and who don’t mind the cloud dependency — the Glowforge Pro earns its place. For power users, small businesses, or LightBurn users who want offline capability and a larger bed, the xTool P2 or an OMTech machine is the smarter buy.
Rating: 8.1/10.
Ready to buy?
Check Price on Amazon →Frequently Asked Questions
What is the Glowforge Pro price in 2026?
Is Glowforge still being sold in 2026?
What does the Glowforge Premium subscription cost?
Is Glowforge better than xTool?
Can you buy a used Glowforge?
Is Glowforge worth buying in 2026?
What is the Glowforge subscription and do I need it?
Can Glowforge use LightBurn?
What is the difference between Glowforge Basic, Plus, and Pro?
How does Glowforge compare to the xTool P2?
Can Glowforge cut thick wood?
You Might Also Like
xTool M2 Review 2026: Price, Specs & Is It Worth It?
xTool M2 review and price breakdown ($599–$749). We tested the only enclosed laser with CMYK color printing hands-on. Full specs, pros, cons, verdict.
ComMarker B6 JPT MOPA Review 2026: One Machine, Three Power Levels
We tested the ComMarker B6 JPT MOPA fiber laser hands-on. 20W/30W/60W field-configurable power on one machine — here's whether that flexibility is worth $3,999.
ComMarker Omni X UV Review 2026: Worth $3,599?
Honest ComMarker Omni X UV review — a 6W enclosed UV laser tested on glass, crystal, and plastic. Is $3,599 worth it over the open-frame Omni XE UV?